Tag Archives: healthy choices

Quick And Easy Taco Salad

Standard
Quick And Easy Taco Salad


I love an easy and delicious weeknight meal, especially when it’s something healthy and satisfying. This is a quick and easy taco salad that uses one of those .49 cent taco seasoning packets from the seasoning isle. Yes, I could’ve gone with a homemade taco seasoning, but really I just didn’t feel like it today😄

Ingredients for taco meat part:

  • 1 lb ground meat (beef, turkey, venison, even chicken would work)
  • 1 packet taco seasoning
  • 1 small sweet onion chopped
  • 1 chopped bell pepper or 3 chopped sweet mini bell peppers (as pictured)
  • 1 garlic clove chopped
  • 1 jalapeño pepper chopped (seeded and deveined)
  • 1 can drained black beans

Ingredients for salad and optional toppings:

  • Chopped romaine lettuce
  • Tomatoes
  • Lime
  • Sour cream
  • Avocado
  • Grated cheese
  • Crushed tortilla chips

1. In a large skillet over medium high heat drizzle a little olive oil over your onion, peppers, and garlic. Sauté for 5-7 minutes.


2. Now that it got a bit of a head start cooking, add your ground meat to the skillet.

 
3. Stir occasionally until browned and cooked completely, then drain off any excess fat if necessary.


4. Add your packet of taco seasoning and 2/3 c water. Turn the heat down to simmer and allow to cook for about five minutes or until some of the liquid has cooked off.


5. Now add your can of drained black beans and allow it to heat up a minute before turning the heat off and serving over your salad.

 
I love fresh avocado, a scoop of sour cream, and fresh lime juice squeezed on mine for the dressing. If you like something sweeter try it with Catalina dressing. Both ways are delicious! 

Advertisement

Seafood Arrabbiata 

Standard
Seafood Arrabbiata 

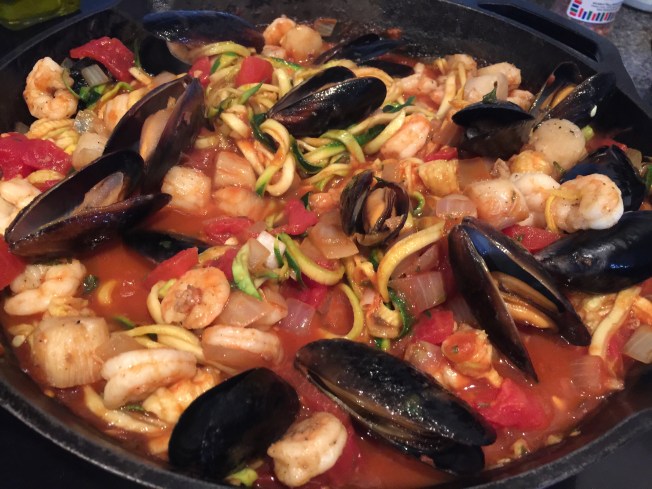
Y’all, this is the most amaaaaazingly yummy dish! “Arrabbiata” is Italian for “angry”, and it comes from the red pepper flakes in the dish. I like my pasta’s anger somewhere between 1) they’re out of my mascara at the store and 2) on hold with American Airlines for an hour and they just hang up on you. Of course, you can add more or less to your liking 😄

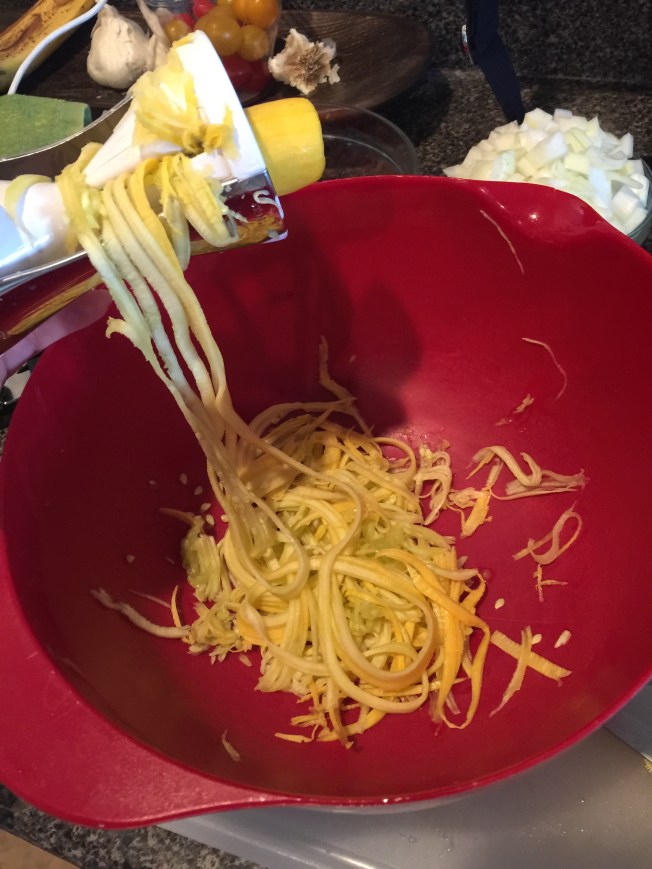
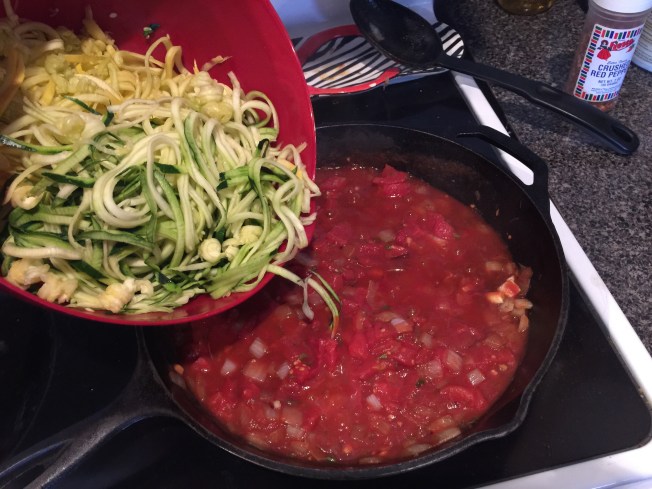
You may have also noticed those aren’t regular pasta noodles in there. No, it’s not spaghetti squash either. It’s yellow summer squash and zucchini cut from my brand spankin new Veggetti! I’m so very happy with my “As Seen On TV” purchase! It cuts the squash into these deliciously long and incredibly pasta-like strands and you can choose thick cut like a linguini or thin cut more like spaghetti/angel hair. That being said, of course you could make this with traditional pasta, but I think you should give the veggie pasta a try!

First, here’s the Veggetti:

You can buy it here on Amazon cheaper than you can get it at Bed Bath & Beyond if you don’t already have one:
Veggetti Spiral Vegetable Slicer, Makes Veggie Pasta

I used yellow squash and zucchini for this pasta, but next time I will probably just use zucchini because it cut up in half the time as the squash and I really couldn’t taste a difference. I’m so excited to try this with my other favorite pasta dishes!

Ingredients:

  • 4 squash, zucchini, or combination of them
  • 1 chopped sweet onion
  • Olive oil
  • 3 chopped garlic cloves
  • 1 15 oz can tomato sauce
  • 1 28 oz can whole peeled tomatoes drained and chopped
  • 2 tsp dried parsley flakes
  • 1/2 lb shrimp (peeled and deveined)
  • 1/2 lb scallops
  • 1/2 lb mussels
  • Red pepper flakes
  • Salt and pepper

1. Get your “pasta” ready by putting your four squash/zucchini through the Veggetti.

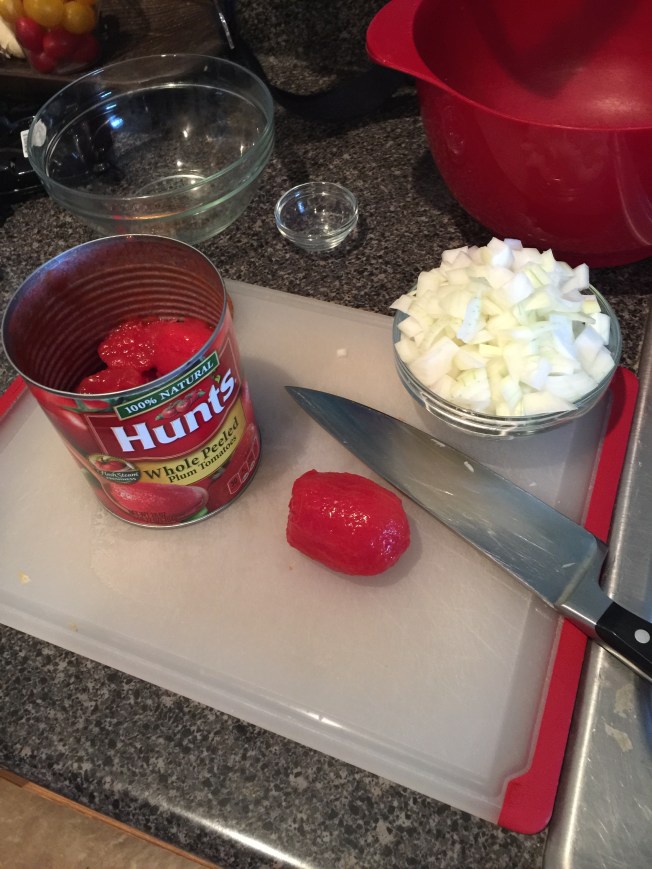
2. Get your can of whole peeled tomatoes and drain the juice, then chop the tomatoes and set aside.

Why am I not using diced tomatoes? Because whole tomatoes are generally the highest quality canned tomato and use plum/Roma tomatoes that have been peeled. Diced tomatoes can be a mix of different kinds of tomatoes and not always peeled, so it’s worth the effort to dice these up.


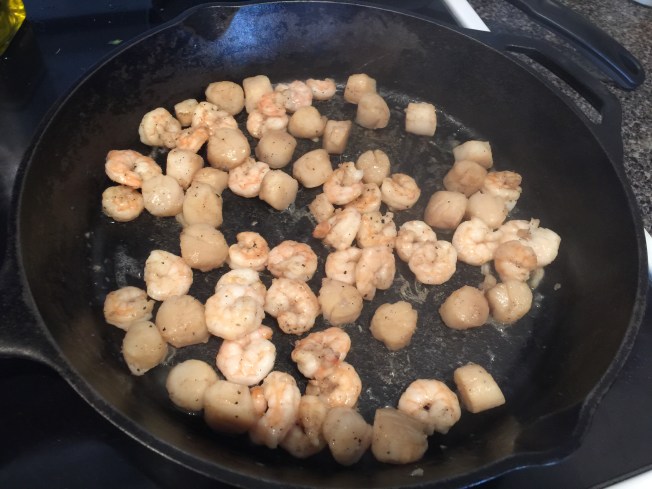
3. In a large skillet over medium high heat, drizzle olive oil and add your shrimp and scallops, season with salt and pepper, and cook until they’re totally done. You might need to drain off a little liquid while its cooking if they give off too much water. Once they’re finished, drain and set aside.

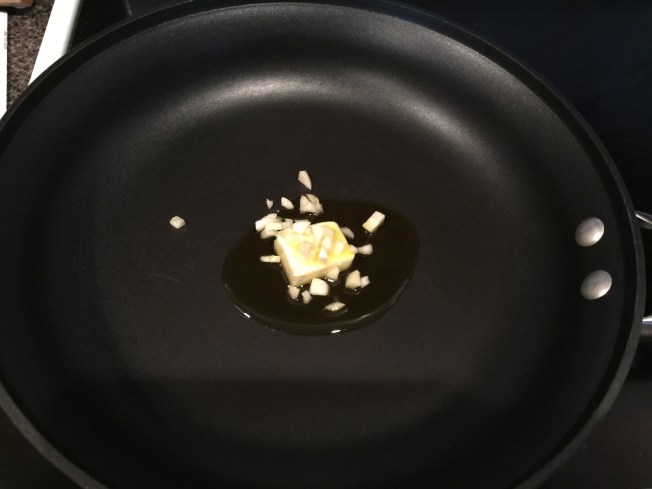
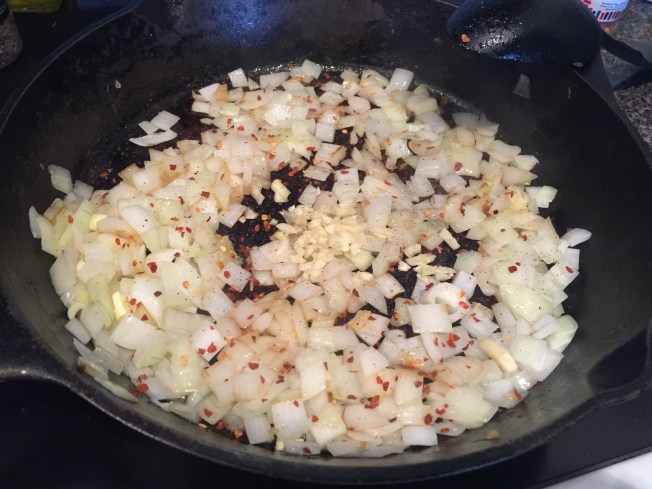
4. In the same skillet, add another drizzle of olive oil and add your chopped onion and season with salt, pepper, and red pepper flakes. Start out with 1/4 tsp and you can always add more later if that’s not enough for you. Sauté for 3-4 minutes.

5. Add your chopped garlic and sauté another minute.

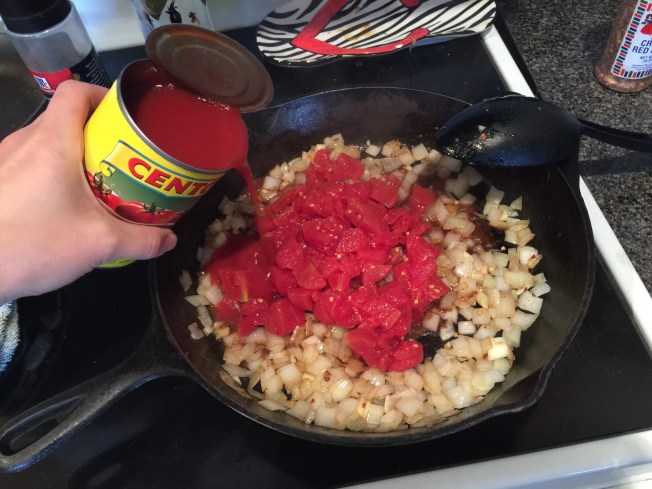
6. Add your chopped tomatoes, tomato sauce, dried parsley flakes, and bring to a boil. Then add your “pasta” noodles, stir, and let boil for one minute.

7. Turn your heat down and add your seafood back into the dish you cooked earlier, plus your mussels.  At my store, mussels are sold already cooked and only need to be heated through. But, if the mussels you purchase are not cooked, add them to the sauce while its boiling and put a lid on your skillet to allow them to steam for a few minutes. You’ll know they’re done once they open up. Any mussels that don’t open are no good and will need to be removed.

Voila! Your angry Italian dish is complete and ready for a glass of wine to go with it!

Mahi Mahi With Basil Lime Butter

Standard
Mahi Mahi With Basil Lime Butter


This is yet another fish dish we are crankin’ out of the Scott household. This latest is another twist on baked fish to jazz it up and give it some flavor. This recipe I used for mahi mahi, but would go great with salmon, flounder, tilapia, etc. It’s a very quick and easy way to make a yummy and healthy fish dinner for your family. I used a pound (two 8 oz filets), but the basil line butter would’ve been enough for double that I think.

Ingredients:

  • 1 lb fish
  • 1 garlic clove chopped
  • 2-3 basil leaves chopped
  • 1/2 lime juice
  • 1/2 lime zest
  • 2 T butter
  • Salt and pepper (pinch of each for butter and also to season fish)

1. Throw all your ingredients together into a small stovetop pot. I ended up only using one basil leaf since mine was ginormous! Melt and stir all together. This should only take about a minute. 


2. Your fish should be on a sheet that’s been sprayed with non-stick spray and seasoned with salt and pepper. Now pour your melted basil lime butter on top.


3. Place your fish under your broiler for anywhere from 5-10 minutes until it’s done (this will depend on type of fish you’re using and thickness).


Yummy! 😄

Honey Lime Mahi Mahi

Standard
Honey Lime Mahi Mahi


Y’all may recall I said we’ve been eating more fish in our house. Here is my latest attempt to eat something other than plain seasoned and baked fish, and I have to say it’s pretty delicious and I’ll be making it again. It will work with any fish I’m sure, but this was for one pound of mahi mahi. 

Ingredients:

  • 1 lb fish filets
  • 1 lime (zest and juice)
  • 1-2 tsps honey
  • 1 tsp olive oil
  • Salt and pepper
  • 1 green onion

1. Chop your green onion and put half in a small bowl with your lime juice, lime zest, honey, a pinch of salt, and olive oil. Save the other half of the green onion for garnish. Wisk the marinade together. Give your marinade a taste and see if you want to add more honey or salt. 


2. Cover a sheet pan with foil and spray with non-stick cooking spray. Place your filets on the pan and season with salt and pepper. Then pour your marinade over the filets.


3. Make sure your oven rack is close to the top of your oven and place the filets under your broiler for 10-12 minutes or until filets are done cooking.


4. Sprinkle your remaining green onions on top and serve with Cilantro Lime Rice to keep with the lime theme! Yum!


Sautéed Greens

Standard
Sautéed Greens


This is a quick and easy recipe for sautéing pretty much any green. This time I had a big bag of mixed greens, but this would’ve been good for any of the greens alone in the mix as well. Serve with a peppery vinegar sauce to take it to the next level of deliciousness!

Ingredients:

  • 1 Lb greens
  • 1 garlic clove chopped
  • 1 T butter
  • 1 T olive oil
  • Salt and pepper

1. First add butter and oil into your largest sauté pan. Also add your chopped garlic and turn on medium high heat.


2. Next, add your greens to the pan. Today, I’m working with kale, Swiss chard, and spinach!


3. I know it looks like waaaay too much food for the pan, but trust me, it’s going to wilt into practically nothing! This is seriously a serving for two people. You’re going to stir it around every little bit to help the cooked leaves get to the top so newer ones can wilt down too. Watch.


4. Add salt and pepper and enjoy like that or add a little pepper vinegar to make it outstanding! Yum!

Oven Baked Sweet Potato Fries

Standard
Oven Baked Sweet Potato Fries


Mmm french fries! I love any and all potatoes almost every which way, but there is a special place in my heart for french fries. Yall might remember I’ve posted a recipe before for sweet potato fries dredged in seasoning and deep fried. While delicious and something I do whenever I’m having a “fry me to the moon” sorta weekend, these are a bit better for you and honestly much easier to do. 

Ingredients:

  • Sweet potatoes
  • Olive oil
  • Your favorite seasoning salt

1. Peel and cut up your sweet potatoes into the fry thickness you desire. Use a very sharp knife, because they’re hard to cut through. I’ve broken three fry cutters that swear they’ll cut sweet potatoes, so just get out your knife sharpener if you need to.


2. Drizzle olive oil all over the fries, then season with your favorite salty seasoning (or even just kosher salt) and toss together so the fries are all coated.


3. Spread out evenly over a sheet pan you’ve covered in foil and sprayed with non-stick cooking spray. 


4. Place in your pre-heated oven at 450 degrees for 20-25 minutes. Give them a good shake about halfway through to make sure they cook evenly.


Enjoy 🙂

Lightly Crusted Flounder With Lemon Butter

Standard
Lightly Crusted Flounder With Lemon Butter

IMG_2596

We’ve been eating a lot of fish lately and baking it, while delicious, can get a little old. So I mixed it up this week by putting a light crust on these filets and finishing them with a little lemon butter and dill. If you have rice flour, I recommend using it because it gives a light and crispy crust that you can’t get with regular flour, not to mention gluten free if you’re into that sorta thing. But if you don’t, regular flour works just fine.

Ingredients:
Flounder filets (I did 2 lbs)
Olive oil
1 T butter
Flour
Dill weed (optional but great addition)
Juice of 1 lemon

1. Season both sides of your filet with salt and pepper. Then using your hands, sprinkle a light dusting of flour on both sides as well.

IMG_2590-0

2. Pour a couple of tablespoons into a skillet on medium high heat. Then put your filets is for a few minutes each side. Leave it 2-3 minutes before flipping it over do it gets a nice crust and is easy to flip. Don’t overcrowd your pan and work in batches, pouring more oil in later if needed.

IMG_2592

IMG_2593

3. Set your fish aside on your serving platter once it’s all done cooking. Then add 1 T butter and the juice of a lemon to your pan and stir around about a minute. Then pour lemon butter over flounder filets.

IMG_2594

IMG_2595

4. Finally, sprinkle some fresh or dried herbs over your fish before serving. I love the taste of dill sprinkled over mine! White wine is fab with this dish 😄

IMG_2598

Acorn Squash

Standard
Acorn Squash

IMG_2600

If you’re anything like me, acorn squash is probably a bit foreign. I know the first time I decided to try one, I had no idea how hard they were to cut into and that I should’ve sharpened my knife first. I didn’t know what it would taste like and wasn’t sure if I would like it because I know I don’t care for butternut squash. But boy, was I surprised at how delicious it was! Do you like Yukon gold potatoes? If so, you’ll love acorn squash. Do you love mashed potatoes or baked potatoes? That’s how I want you to think of acorn squash. Not that horrible cauliflower substitution for mashed potatoes, but a deliciously creamy and healthy substitution for a potato obsession. This recipe will be like healthy mashed potatoes, but feel free to change it up and serve with cheese and a little sour cream for a “baked potato” version!

Ingredients:
Acorn squash
Olive oil
Garlic salt
Pepper
1 T butter

1. First and most important, sharpen your biggest kitchen knife. If you have a dull knife, you won’t cut through this bad boy, trust me on that.

IMG_2575

2. Now you’re going to scoop out the seeds. I love my grapefruit spoon for this, but a regular spoon will work too if you don’t have one.

IMG_2576

IMG_2577

3. Now put your acorn halves on a baking sheet and drizzle olive oil on both sides.

IMG_2578

4. Now bake on your center rack in a 400 degree oven for about an hour. You’ll know it’s done when you can easily stick a knife in it just like a baked potato.

IMG_2587

5. Now scoop out the inside of the squash into a mixing bowl. Add garlic salt and pepper to taste and your tablespoon of butter.

IMG_2588

6. Mix together and serve just like mashed potatoes! Soooo good!

IMG_2601

Sweet Chili Glazed Salmon

Standard

IMG_2422

Ok y’all, if you’re searching for the best salmon ever recipe, you can rest now because this is it! I had seen a recipe using sweet chili Asian sauce and orange marmalade on salmon and thought “Well there’s a cool idea!” and came up with this delicious concoction. It was so yummy my husband had me go back up to the store today and buy four more pounds of salmon to keep in our freezer for me to make this recipe again soon!

*  I have since revised this recipe so that it uses less sauce and it is just as delicious! *

Ingredients:
2 lbs salmon cut into filets about 8 oz a piece
1/4 c sweet chili sauce (found on the Asain isle – I love the Grama’s Sweet Chili Glaze) 
1 T apricot preserves
1 T soy sauce
1 T chopped green onions
1 garlic clove minced
Salt and pepper

1. In a small mixing bowl pour in your sweet chili sauce, apricot preserves, green onions, garlic, and soy sauce and whisk together.

IMG_2391 2. Cover a sheet pan with foil and spray with non-stick cooking spray and lay salmon skin side down on the sheet. Season the salmon with salt and pepper, then pour sauce over the top of the salmon and allow it to marinate that way for about 30 minutes.


3. Once it’s done marinating place the salmon near the top of your oven under the broiler for approximately 15 minutes. You’ll want the sauce to caramelize on top of the fish and don’t worry if you see the sauce burning that slid off the fish and is stuck to the foil. 

*This is a picture from my original post, but you’ll get the idea of what the fish will look like when it’s done.

  
It’s now ready to eat and so yummy! My husband likes to pour a little extra sweet chili glaze on the side to dip his in. Yum! 😍

Confetti Quinoa

Standard
Confetti Quinoa

IMG_2161

I get asked a lot about how I cook quinoa. The answer is: any way and every way you cook rice. It’s versatile and delicious, and very good for you. If there was a such thing as “the perfect food for you,” this would be it. This recipe is great for side dishes, or served as the main dish with some added grilled chicken or stuffed into acorn squash. I’ll give you my other favorite way to eat it at the bottom.

Ingredients:

1 sweet onion
1 bell pepper or a handful of those sweet tri-colored peppers
2 garlic cloves
3-4 kale leaves (or Swiss chard)
1 10.8 ounce frozen bag of mixed vegetables
1 1/2 c quinoa (any kind – I used rainbow quinoa)
Salt, pepper, cumin powder, Knorr chicken bouillon cube
Olive oil
3 c water

1. Drizzle some olive oil into a pot or Dutch oven and sauté chopped onion and peppers in there about 10 minutes over medium to high heat.

IMG_2167

2. Add the frozen vegetables and chopped garlic cloves and season everything with salt, pepper, and a few healthy dashes of cumin powder.

IMG_2168

IMG_2162

3. Chop up your greens and add to your pot.

IMG_2169

4. Add your 1 1/2 c quinoa, 3 c water, and crumble up your chicken bullion cube and turn your heat up to bring everything to a boil.

IMG_2164

5. Put a lid on your pot and turn the heat down to simmer. Allow it to cook just like rice – about 20 minutes. My son loves his with cut cherry tomatoes served on top.

IMG_2165

Mexican Quinoa – add a chopped jalapeño with the sweet peppers and omit kale/spinach. After it’s done cooking add fresh chopped cilantro and 1 can of drained black beans.