Category Archives: Dinner

Portobello Mushroom And Shrimp Fettuccine Alfredo

Standard
Portobello Mushroom And Shrimp Fettuccine Alfredo

I love a yummy comfort food pasta, and this definitely fits the bill. It warmed me up on this cold day, and was even better later re-heated. Just remember it’s only as good as the ingredients you put in it, so choose a good cheese and a good heavy cream for your sauce, and always keep good butter on hand. You can choose pretty much any vegetable to put in here instead of mushrooms (or omit them entirely), but I think the mushrooms paired nicely with the shrimp. Also, I think garlic would’ve gone nicely with the dish and will definitely try it in there next time I make this.

Ingredients:

  • 1 1/2 sticks of butter
  • 1 pint heavy cream
  • 1 lb fettuccine pasta
  • 1 carton of mushrooms
  • 1 1/2 lbs shrimp (peeled and deveined)
  • 2 cups of shredded Parmigiano-Reggiano cheese or Parmigiano-Asiago blend
  • Salt and Pepper

1. Bring a large pot of salted water to a boil and cook your pasta as directed on pasta box or how you like it. Personally, I think al dente is gross and like fully cooked pasta 🙂 You can begin work on the next steps while your pasta is cooking. Note that when the pasta is done, it’s best to drain it and put it straight back into the pot you cooked it in and toss with some olive oil to keep it from sticking together.

unspecified-4

2. Slice your portobello mushrooms and then sauté with 2 tablespoons of butter and season liberally with salt and pepper. Allow to cook for a few minutes on medium-high heat, then take out of skillet and place into bowl for later.

unspecifiedunspecified-1unspecified-2

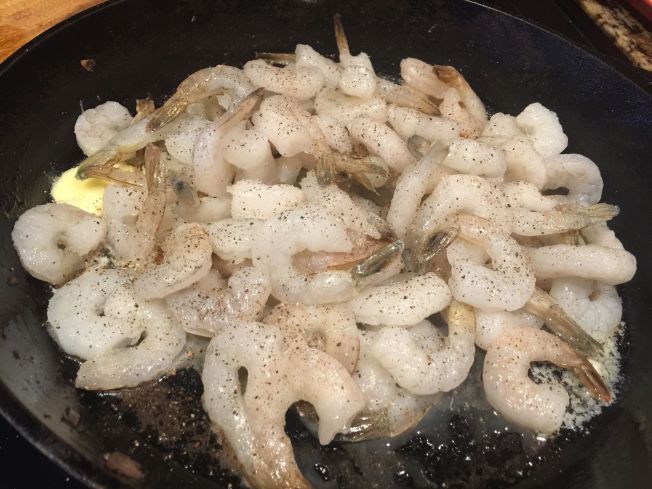
3. Make sure your shrimp is as dry as possible by patting it dry with a paper towel before adding it to your skillet.* Add another 2 tablespoons of butter to your skillet and add your shrimp and season liberally with salt and pepper. Cook on medium-high heat for a few minutes and stir around to make sure both sides are cooked evenly. You’ll know they’re done when they turn orange and form little c’s.

*I find that whenever I use previously frozen shrimp that no matter how well I pat them dry, I still end up having to drain off excess liquid during the cooking process. It’s ok if you have to do that, just remember to re-season them later if necessary.
unspecified-3unspecified-5

4. Place your shrimp into the bowl with your mushrooms and place your whole stick of butter into the skillet now with heat reduced to medium. The butter will start to melt quickly, and once it does, you will add your pint of heavy cream to the skillet. Allow it to simmer on this elevated heat for about two minutes, then turn the heat down on low. Also, I hope you have as cute as a kitchen helper as I do during this step. 🙂

unspecified-7unspecified-9unspecified-8unspecified-10

5. With the heat on low on your heavy cream and butter, now you’ll add your 2 cups of cheese. Allow it to melt into the sauce for a few minutes, then season it liberally with salt and pepper. This step is important, or else your pasta sauce will be bland.

unspecified-11

6. Now add your bowl of mushrooms and shrimp back into your sauce, and add your fettuccini to combine it all into one big pot.

unspecified-13unspecified-15unspecified-16

7. Enjoy 🙂

unspecified-17

Easy No Peel Salsa For Canning

Standard
Easy No Peel Salsa For Canning


I finally had enough tomatoes between my garden and my friends’ to make some salsa this year. It was a terrible year for my tomatoes, but everything else seems to be doing great in the garden. Better luck next year I hope. 

Anyway, I couldn’t wait to make some yummy salsa to put away in my pantry for my last minute canning before harvest season is over. This recipe does not require you to boil, peel, and core your tomatoes. That’s why I’m calling it easy! Does it alter the taste of your salsa? Not in the slightest way (in my opinion)! It’s delicious and is also a fantastic way to throw in those cherry tomatoes from your garden! They have such a delicious flavor and add just the right amount of sweetness. If you don’t have them, don’t worry; just use whatever tomatoes you’ve got on hand.

Ingredients:

  • 1 gallon of washed tomatoes chopped in half or in quarters to go into your food processor (if using cherry tomatoes, just leave them whole) 
  • 3 medium sweet onions 
  • 5 bell peppers any color
  • 4-5 jalapeño peppers with seeds (or without if you don’t like salsa with a kick)
  • 3 tablespoons salt (I love to use pickling salt when preserving food)
  • 1/2 c bottled lemon juice & 1/2 c bottled lime juice (you MUST use bottled juice and not fresh when canning)
  • 1 bunch of cilantro
  • 2 cloves of garlic 

1. How in the heck do you measure a gallon of tomatoes? My favorite way is to throw them into my gallon size Tupperware that clearly has a “1 G” printed on it. Don’t have one? Maybe you have a quart size Tupperware or measuring cup laying around. Remember, four quarts in a gallon 😊 Wash your tomatoes and process them in batches in your food processor. I found 5 pulses worked for me on the cherry tomatoes, and 6 pulses for the regular tomatoes. 


2. Here is where you’re going to drain each batch of tomatoes through your strainer before putting into your pot. I used a silicone spatchula to press the juice out of the tomatoes. You can see how much juice is in there in the beginning vs the end after the spatchula/strainer. 


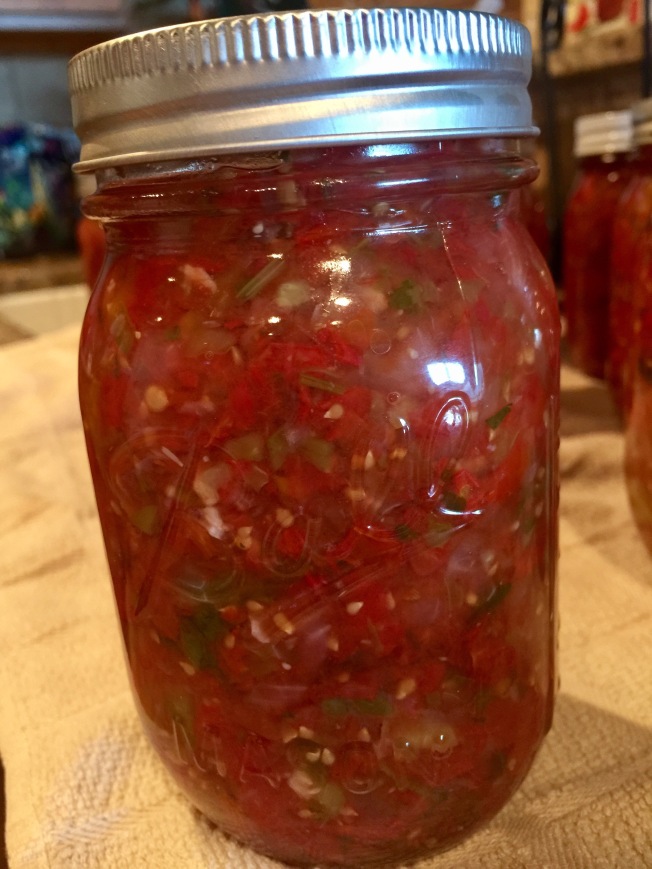
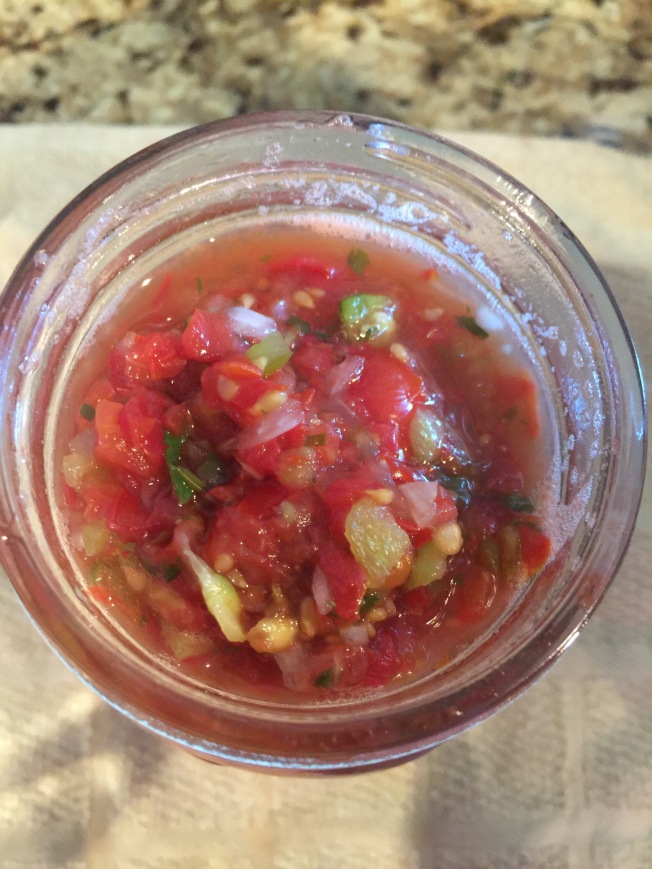
3. Continue to run your peppers, onions, garlic, and cilantro through the food processor and add to your tomatoes. There’s no need to drain any of them, and you should pulse to the consistency you like. Personally, I like my salsa chunky.


4. Now add your salt and bottled lemon and lime juice. These babies are exactly 1/2 a cup each. You can choose to do all lemon or all lime if you like. I just like the flavor the mix gives them. ***IMPORTANT: You must never alter the amount of acidity in a recipe for tomatoes. They do not contain the acid they once did, and canning with incorrect acidity leads to botulism. You cannot smell or detect botulism on your own, so do not risk it. Also, the acidity of lemons and limes can change daily and are not reliable, so that is why it’s important to use canned juice only. It is cooked and maintains a certain ph that is safe for preserving food.***


5. Bring to a boil and then summer for 15 minutes, stirring often to prevent sticking on the bottom.


6. Pour into your prepared jars. This recipe makes about 10 pint sized jars.


7. Wipe your rims before sealing and give them a 15 minute water bath (or more depending on your elevation). Voila! You have delicious salsa that is shelf stable and ready to eat all through the winter months 🙌🏻

Smoked Stuffed Cabbage

Standard
Smoked Stuffed Cabbage

  
Y’all remember from my last post about smoking meatloaf and how delicious it was. Well this time we decided to smoke some stuffed cabbage, which again was inspired by seeing it on a restaurant menu at a BBQ place. It was so good and I hope you’ll give it a try the next time you’re considering sides for your next BBQ.

Ingredients:

  • 1 large head of cabbage
  • 1 lb bacon
  • 1 sweet onion
  • 1 jalapeño chopped (with seeds if you like it hot)
  • 2 T butter divided 
  • Olive oil
  • 1 garlic clove chopped
  • Salt and pepper

1. First prep your cabbage head by peeling off and discarding the outer leaves. Then core it by using a sharp knife to dig out the core and scoop out enough room to stuff it.


2. Slice your bacon into bite size pieces and cook in your skillet. Then take out the cooked bacon and place onto a plate with a paper towel to allow it to drain and remove all but a couple spoonfuls of the bacon grease from the skillet.


3. Now add your chopped sweet onion, jalapeño, salt, pepper, and 1 T of butter and sauté for about 15 minutes allowing the onion to caramelize. Then add your garlic in and cook another 5 minutes or so.


4. Turn the heat off and add your bacon back to the mix. 


5. Drizzle the inside of your cabbage head with olive oil, season with salt and pepper, and add your other T of butter. Then begin to fill with your stuffing.


 6. Now wrap it all up in foil and put it on your smoker at 225F about 3 hours. Your cooking time might vary depending on how hot your fire is and the size of your cabbage, but you’ll know it’s done when the cabbage turns very soft.  

  
7. Once it’s cooked bust that puppy open like a bloomin’ onion and chow down!


Smoked Meatloaf

Standard
Smoked Meatloaf

  
Yes, you heard me correctly… Smoked meatloaf is where it’s at my friends! I will never again make meatloaf in the oven after eating this! Wow! It was juicy and delicious with the most awesome smoke flavor. Seriously yall, you’ve got to try this!

It’s my husband’s birthday this week and I know he’s always wanted a smoker. So I got him one and of course we couldn’t wait to try it out. Aside from the obvious things people smoke, I wanted to try a slightly adjusted meatloaf version of my regular meatloaf recipe. I had heard about a restaurant that serves it as well as traditional smoked BBQ, and I’m so glad it worked out for us too!

The key is to cook your meat at about 225 degrees (low and slow). I had originally thought it would take about 4 hours to cook my two pound meatloaf, but it ended up being done right at 2 1/2 hours. My original plan was to glaze it halfway through, but when my husband went to glaze it, the internal temperature was at 165, so it was time to come off. I ended up glazing it and running it under the broiler for a few minutes in my oven, which worked out just fine. Either way you want to glaze this will work.

Ingredients:

  • 2 pounds ground meat
  • 1 sweet onion chopped
  • 1 large bell pepper chopped
  • 1 garlic clove chopped
  • 1 beaten egg
  • 1 c Italian breadcrumbs
  • 1 T butter
  • Olive oil
  • Salt and pepper
  • Ketchup, mayo, and BBQ sauce
  • Optional but highly recommend  Weber 17103 Mesquite Wood Chips, 3-Pound

1. First get your firewood going in your smoker with your favorite wood. My dad loves to use Post Oak to smoke all his stuff with, but we don’t have any of that in Amarillo. I buy the cheapest firewood possible and flavor it with a few of those mesquite wood chips I was telling you about.


2. Let’s get your veggies going for the meatloaf mix. I know I said 1 large bell pepper earlier, but I have baby bell peppers growing in my garden so I grabbed enough that I thought would equal one large one.


3. Season veggies liberally with salt and pepper and drizzle with olive oil. After about 15 minutes of cooking them over medium heat, toss in your chopped garlic and cook another five minutes or so. Also, it was at this stage my veggies were crying out for butter, so I happily obliged and added about a tablespoon or so. Because, why not?


4. In a large mixing bowl have your ground meat ready to go seasoned liberally with salt and pepper.Then add your cooked veggies.

  
5. Now add a healthy squirt of ketchup and BBQ sauce, and a heaping spoonful of mayo. We are serious about BBQ sauce in our house. Also, if you live in the South you probably already know about Duke’s mayo. But if you don’t, I highly suggest you acquaint yourself. Yum!


6. Now add your beaten egg and breadcrumbs to the bowl and mix it up with your hands so they’re all one big happy family!


7. Now get out your foil and place the meatloaf on the dull side to prevent sticking. This was my first time using Kingsford Hd Non-Stick Foil, 45 sq. ft. and I loved it! Absolutely no sticking whatsoever! 


8. If your smoker temp is around 220, wrap your meatloaf up and get to smokin’! Also, crack open a beverage because it’s beer thirty!


9. Like I said earlier, my meatloaf was done at 2 1/2 hours, so I didn’t glaze it here. Be sure you have an instant read thermometer so you can get the temperature right on the meatloaf. The USDA recommends a temp of 160, but also keep in mind it will continue to cook once you pull it off, so you don’t want to let it go much higher than that. Weber 6492 Original Instant-Read Thermometer <— Click here if you don’t have one and need one.


See how the temperature keeps rising even after its off the heat?

10. For the glaze, I do 60% ketchup and 40% BBQ sauce. Don’t get out your measuring cups, just eyeball it and adjust it to how you like it. You can change it up by adding worchestishire or brown sugar or anything else you like. But I’m just a simple gal that loves a simple glaze. 😜 

  
 11. Dump and smear it all over your meatloaf and then place it under your broiler for a few minutes.

  
12. Now it’s done! Wow! Have you ever smelled anything so delicious? It’s like someone sprinkled crack on mom’s meatloaf. So good 😀


Apple Butter

Standard

  
One of my favorite things in life is apple butter on top of a buttery piece of toast in the morning. Yum!!! I also love the excitement of when the grocery store here gets their big shipment of apples in, and I always get a bunch of my favorite Honey Crisp apples. Those, as well as a few other kinds make up this recipe of apple butter, but feel free to stick with just your favorite or go all out like I did.*

The rich gold color comes from the length of time you let this slow cook. I did mine for 8 hours, but I easily could’ve let this go all night in a crock pot if I had one big enough. 

You can either make this recipe and freeze it or can it. I canned mine and I’m not going to get too descriptive in the canning instructions because I’m going to assume you know what you’re doing. If not, see my Strawberry Apricot Jam recipe for further detail or of course just ask me in the comment section.

*I used a mix of mostly Honey Crisp, Golden Delicious, Sweet & Crunchy, and a girl in my MOPS group gave me some from her tree at home that looked like McIntosh to me, but she wasn’t sure what kind they are. 

Ingredients: 

1. First lets prep those apples! But first, let’s spike some cider to get us in the mood 😉 Ok, now then…


2. Toss all your apples into your giant pot.

  
3. Now dump in your spices, sugar, and cider and bring to a boil. *If you’re doing this in a crock pot you can just turn on low and come stir it in a few hours. Let it boil for a minute or so, then turn down to a simmer. Cover mostly with a lid but allow a small space to remain to let some of the steam out.


4. Now you’re going to let this slow cook for a minimum of six hours (I did mine eight but could’ve gone longer like I said before) but keep coming back to give it a stir every now and then.


5. Once it’s the color you want, get out your hand blender and go to town on these puppies!


6. Now you can either divide this out and freeze it, or can it like I did with a ten minute water bath. Again, check my recipe above for water bath times where you are if you aren’t sure. This made 14 1/2 pint jars. 

  
7. Now go get a big honkin’ slab of butter and put it on some bread, toast it up, and then lather it up with some golden apple butter. Delicious!


Perfect Mexican Cornbread

Standard
Perfect Mexican Cornbread

  
Fall is just around the corner and that means the county fair is on its way for this part of Texas. So I’ve been working all summer on trying to achieve the perfect cornbread recipe to enter into the cornbread contest. I’ve finally got it! My husband even said “This is the best cornbread I’ve ever had in my life!” 😍 I’ll keep yall posted if I win, but even if I don’t, this cornbread is still delicious!

*Update* My cornbread won third place yall in the Tri-State Fair! It was entered into the cornbread contest and 1st and 2nd prize went to plain cornbread, but they said they loved my Mexican cornbread! Hopefully next year they’ll separate the categories into a plain cornbread and Mexican cornbread, but I’ll take it for this year! 😊

Ingredients:

  • 1 1/2 c cornmeal 
  • 1/2 c all purpose flour (you can also use whole wheat flour or corn flour)
  • 4 tsp baking powder
  • 1/2 tsp salt 
  • 1 T honey
  • 1 c milk
  • 2 eggs
  • 1/4 c oil 
  • 1/4 c sour cream
  • 1/4 – 1/2 c chopped green chiles (I used Hatch fire roasted chiles and you can adjust the heat by either using 1/4 c or 1/2 c) *if you don’t have these fresh they come canned nearly everywhere
  • 1 c frozen corn kernels 
  • 1 c shredded Mexican cheese (you can just use cheddar if that’s all you’ve got on hand) 

1. Get all your ingredients into a large mixing bowl.

  
You can use your favorite cornmeal mix. I love this one and plus, it’s from Texas 😀🌵💪🏻


2. After you’ve mixed everything together really well you’re going to pour it into your greased 10 inch cast iron skillet, or as I like to call her “Ole’ Faithful”.

  
3. Now put into a 400 degree oven for 20-25 minutes or until the top starts to turn golden. 

  
4. Serve with a giant pat of butter and top with chow chow or eat plain. And don’t forget the wine! Wine, butter, and carbs = perfection. 


Stuffed Acorn Squash

Standard
Stuffed Acorn Squash

  
Today the weather was almost fall-like with lows in the 50’s and a high of only 71. So I thought I’d prepare one of my favorite fall dishes of stuffed acorn squash. I call it a fall dish only because acorn squash is considered a winter squash, but it’s delicious year-round. Also, keep in mind that I’m stuffing with the vegetables I have on hand in my garden right now. I’ve done this with a ton of different vegetables, so just do whatever you’ve got on hand! It’s easy to throw leftover chicken into this dish or a can of drained black beans. Next time I’ll grab some sweet potato and Brussels sprouts from the store to throw in there too! 

Ingredients: 

  • Acorn squash halved and de-seeded
  • Olive oil
  • Seasonings
  • 1/2 sweet onion finely chopped
  • Small bag of frozen vegetables (I used a 12 oz bag of corn/green beans/carrot mix)
  • Garlic clove chopped 
  • 1 squash chopped
  • 1 zucchini chopped
  • 1 jalapeño chopped
  • 1 T butter
  • 1 c quinoa

1. First, sharpen your chef’s knife to cut this puppy open.

  
2. Now you’re going to remove the seeds. I like to use a grapefruit spoon, but a regular spoon works just fine too. 


3. Now drizzle with olive oil and season with your favorite all-purpose sort of seasoning. I love to do Tony’s, but of course you could just do salt and pepper too. 

  
4. Now pop into a 375 degree F oven and let’s get started on your veggies. These will cook for an hour.


5. Once you’ve got all your veggies chopped that you want in there, put them in your pot and drizzle them with olive oil and season liberally with either your all-purpose seasoning or salt and pepper. Also, throw a tablespoon or so of butter in there just ’cause it’s delicious. 

  
6. I like to cook these on medium heat for about 10 minutes or so just to give them a head start. 

  
7. Now add 1 cup of quinoa and 2 cups of water to this and bring to a boil for a minute, then turn to simmer and put the lid on (exactly like you cook most rice). 

  
8. After 20 minutes or so, your quinoa is cooked! If you still have some liquid in there you’d like to cook off (depending on how much water your veggies released), just cook it a few more minutes. 

  
9. Would you look at the time? The acorn squash is done in perfect time for the stuffing!

  
10. Eat like a loaded baked potato with a yummy glass of red wine 😊🍷


Fried Green Tomatoes

Standard
Fried Green Tomatoes

  
I picked so many green tomatoes today, and aside from using most of them for my Chow Chow, I thought I’d fry some for a delicious Southern treat.  

First, let’s bask in the glory of my 18.6 lbs of green tomatoes…

  
It’s glorious. Also, I think you can see that I am most definitely team Targaryen. I’m also in the R + L = J conspiracy theory group, and have high hopes to see my boy Jon rise from the dead next season. But anyway, back to my tomatoes… 

Ingredients: 

  • 2 large green tomatoes 
  • 1 c all purpose white or wheat flour
  • 1 c cornmeal based fish fry (I love the Louisiana fish fry mix) 
  • 1 egg
  • 1 T milk
  • Canola, peanut, vegetable, or your favorite oil for frying

1. Slice up those emerald beauties. Also, start heating up your frying oil. You’re shooting for 350, so it should be on medium to slightly higher than medium heat.

  
2. Prepare your egg wash by mixing your egg with 1 T milk.

  
3. Prepare a little batter station for you to dip your ‘maters in. Fish fry in one shallow dish, flour in another, and your egg wash mixture in the middle.


4. Now dredge your ‘maters in the flour first, shake off the excess, then bring it over to your egg wash bowl.


5. Now dredge it through the fish fry and shake off any excess.

  
6. When your oil is ready to go, put those puppies in there for about a minute to a minute and a half, then flip them over. After another minute or so, take them out and allow them to drain. You can use a paper towel, but both sides will stay crispy better if you allow it to drain on something that elevates it like a cooling rack over a paper towel. 


Now flip… Another minute on this side and they’ll be done. 

Now allow them to drain and cool for a minute before eating. Absolutely divine! 


Salmon With Lemon Butter Sauce

Standard
Salmon With Lemon Butter Sauce

  
This is a yummy salmon dish with a delicious lemony-buttery-garlicky sauce and a sprinkle of dill. I usually buy my salmon fresh from the seafood market in my grocery store, but our SAMs had a sale on 6 oz frozen salmon fillets and they worked out perfectly for this dish! Just let them defrost of course first if that’s what you decide to use too. 

Ingredients:

  • 4 6oz salmon filets
  • 1/2 c unsalted butter (1 stick)
  • 1 garlic clove
  • 1 lemon
  • Salt and pepper 
  • Fresh or dried dill weed (optional)

1. In a small sauce pot melt your butter stick on low-ish heat. You’re not cooking the butter, just melting it. Also, pre-heat your oven to 375F.

  
2. Get out your little microplane grater and grate your garlic clove and also zest your lemon. Put it straight into your butter. Then, squeeze the lemon juice into there too. Mmm, starting to smell good in here! 


3. Line up your salmon in a baking dish and say to yourself “One fish, two fish, red fish, blue fish!”

  
4. Then, pour your yummy sauce all over your fish.

  
5. Now season your salmon with salt and pepper.

  
6. Now put it in your oven at 375…

  
7. I checked it at 15 minutes and it was at this point I remembered I had fresh dill growing in the garden. Yay! So I swished the butter around in the dish to make sure it was flavoring up everything and then threw some dill on it. Basil would be good, parsley, or even chives. Or you could just leave it without the herbs too 😉

Then it’s back in the oven another five minutes.

  
 8. After 20 minutes or so it’s done! This calls for a red wine blend! ☺️


Creamy Avocado Dressing With A Kick

Standard
Creamy Avocado Dressing With A Kick

  
This dressing is delicious on a salad or used as a topping for fajitas, nachos, or even a veggie dip. My favorite way is on a fajita salad. Yum! 

Ingredients:

  • 1/2 avocado if using a regular to largish avocado, otherwise a whole small one
  • 1/2 c sour cream
  • 1 handful of cilantro (roughly 1/4c)
  • 1 garlic clove chopped
  • Juice of 1/2 lime
  • 1 jalapeño (with seeds or half seeds if you don’t like the heat) 
  • 1/4 tsp salt
  • 1/4 tsp pepper
  • 1/4 tsp sugar 

1. Chop your garlic and jalapeño before putting in your food processor to make sure there are no chunks. I use my mini food processor for this. 


2. Blend away!

  
3. Mmmmmm, it’s heavenly! 

  
4. Yum!