Monthly Archives: October 2013

Spicy Chili

Standard
Spicy Chili

image

Yesterday when I woke up it was cold and foggy outside, and that’s when I knew for sure, beyond a shadow of a doubt… It was a perfect day for chili! This chili has the perfect amount of kick and goes perfectly on baked potatoes (pictured), tamales, Fritos, French fries, or even by itself. Trust me, you could put this on an old leather boot and it would be delicious!

Ingredients:
2 lbs ground meat (beef, turkey, deer, whatever you like)
1 large sweet onion chopped
1 large jalapeño chopped
3 cloves of garlic chopped
1 12 oz beer (I used a Miller Lite, but any beer dark or light would be ok. Rule of adding drinks like this to food is if you wouldn’t drink it, don’t put it in your food. That means don’t buy the cheap stuff.)
1 can Rotel
1 cup Spicy V8 juice
3 tablespoons chili powder
2 teaspoons each of garlic salt, paprika, and cumin powder
1/4 teaspoon cayenne
1/4 cup ketchup (Heinz ketchup is my favorite)
1 tablespoon yellow mustard (I love French’s)
Olive oil
Salt and pepper to taste

1. Add onion and peppers to pot and drizzle with olive oil and season with salt and pepper (go easy because you can always add more later, but you can’t take it out once you’ve added it). Sauté for 20 minutes on medium to high heat.

2. Add ground meat and chopped garlic and sauté until fully cooked. Add seasonings and stir well. At this point you can either keep in pot or transfer to crock pot on low.

3. Add beer, Rotel, V8, ketchup, and mustard and keep at a simmer on stovetop or crockpot for a few hours or even all day.

4. Garnish chili with your favorite toppings before serving. Classic chili toppings include onion, green onion, cheese, sour cream, and avocado.

Roasted Onions And Potatoes

Standard
Roasted Onions And Potatoes

image

Nothing says caveman (or cave-woman) quite like a meal of meat and potatoes. I like to make these roasted onions and potatoes with a medley of different potatoes, and sometimes with just sweet potatoes. Either way it pairs perfectly with any grilled meat, but my favorite is steak. Trust me when I tell you these are some tasty taters!

Ingredients:
1 large red potato
1 large sweet potato
1 handful of purple potatoes
1 large sweet onion
1/2 stick of butter
1 jalapeno sliced
Olive oil
Salt and pepper

1. Slice all of your potatoes into circle slices, slice onion into slivers (not too thin, don’t want them to burn), and jalapeno into slices. Place these in a cast iron skillet (or baking dish if you don’t have one) and drizzle with olive oil.

2. Season liberally with salt and pepper and stir them all around making sure olive oil and seasoning is well distributed. Top with 1/2 butter cut into slices and bake in 375 oven for approximately 1 hour.

Taco Soup

Standard
Taco Soup

image

This is my favorite soup and perfect for simmering in a crock pot or on your stove top. It’s easy to make and very delicious! I recommend eating this with a glass of wine by the fireplace. Perfection 🙂

Ingredients:
1 can Ranch Style beans (you can use a can of pinto beans in a pinch)
1 can black beans
1 can petite diced tomatoes
1 can whole kernel corn or 1 cup frozen corn
2 cans diced green chiles or 3 roasted and diced chiles
1 lb ground meat (beef, turkey, deer, whatever)
1 sweet onion diced
2 garlic cloves diced
1 packet Hidden Valley Ranch mix
1 packet taco seasoning (I like McCormicks)
1 chicken bouillon cube
4 cups of water

Ingredients for garnish:
Sour cream
Shredded cheese
Green onion
Crushed chips or fried corn tortilla strips

1. Sauté for 10-15 minutes on medium to high heat chopped onion drizzled with olive oil. After it turns translucent add ground meat and chopped garlic cloves. Once meat is fully cooked add both seasoning packets and stir well. At this point you can either dump contents into crock pot set on low heat or keep in soup pot.

2. Add beans, corn, tomatoes, chiles, bouillon, and water. Do not drain anything before dumping into pot. Allow soup to simmer for several hours if you can before serving so that flavor has time to develop.

3. Serve with your favorite toppings. Personally, I like to cut a corn tortilla into strips and fry in a little oil in a sauté pan then drain on paper towel and season immediately with a little Tony Chachere’s seasoning. I love the works on mine: fried tortilla strips, cheese, a dollop of sour cream, green onion, and sometimes a dash of Louisiana hot sauce to take up the heat an extra notch.

Pulled Pork Tacos

Standard
Pulled Pork Tacos

vm02avfa29vpfnuob54h4k9ixljdykqj

I love shopping on Mondays at our local grocery store, because that’s when they put all of their meat on sale they’re trying to get rid of before their new shipment comes in. I have an extra freezer at my house for this very thing because the deals they offer are just too good to pass up. Earlier this week one of my purchases was pork shoulder blade roast for $7. My family of three has been eating pulled pork every day for a week and I still have some leftover! Needless to say, I had to get creative with how I prepared it every night so we didn’t get tired of eating the same thing. So after preparing pulled pork sandwiches, pulled pork enchiladas, and pulled pork breakfast sandwiches, I decided to make tacos with it one night. It has definitely been our favorite way to eat it! Pulled pork tacos aren’t anything new, but here is my recipe for them:

Ingredients
1.5 – 2 pounds pulled pork
1 can black beans drained
1/2 sweet onion chopped
2-3 tablespoons of your favorite BBQ sauce (I use Sweet Baby Ray’s Original)
1 garlic clove
Salt and Pepper
Handful of chopped cilantro
Tortillas (I use white corn, my husband uses flour)
Olive Oil
2 roasted green chiles or 1 small can diced green chiles (optional)

1. In a saute pan or cast iron skilled heat chopped onion over medium to high heat with a drizzle of olive oil and cook until it begins to caramelize. Season with salt and pepper and add garlic cloves. Saute for a few more minutes at medium to high heat.

2. Add pulled pork, drained black beans, chiles (if you’re using them), BBQ sauce, and cilantro. Turn heat down to low and stir until it is entirely heated through and ready to eat.

3. In a separate skillet on high heat drizzle olive oil in there and heat tortillas on both sides. Stuff with pulled pork filling and top with your favorite taco toppings. My favorite is to top with my homemade salsa.

Homemade Salsa

Standard
Homemade Salsa

image

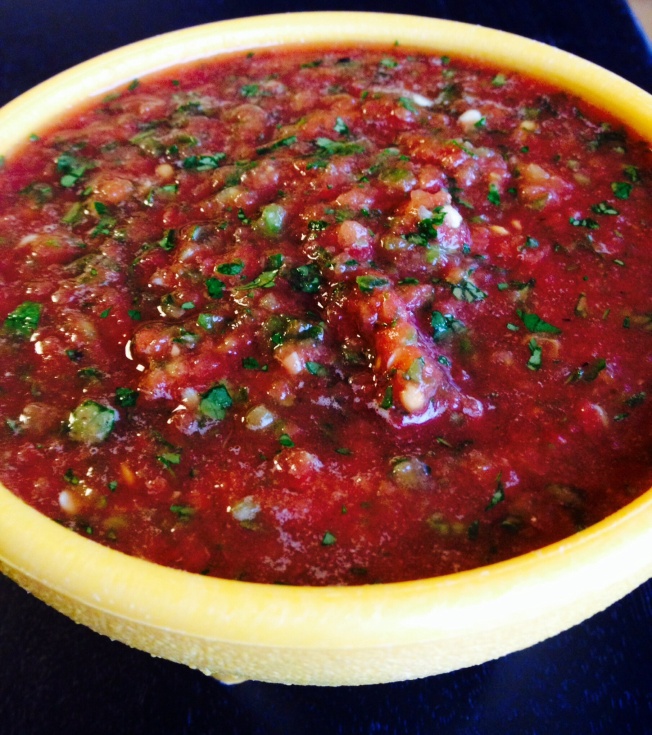
My Uncle Dale first made this homemade salsa years ago and each member of my family has tweaked it to their own tastes. This happens to be how I like it best, plain and simple, but feel free to change the ingredients by adding fresh garlic, fresh onion, serrano peppers instead of jalapeños, etc.

Ingredients:
1 10 oz can of Rotel
1 14.5 oz can diced tomatoes
1 handful of fresh cilantro
2 jalapeños with stems/seeds
1 teaspoon garlic salt
1/2 teaspoon black pepper

1. Place peppers, cilantro, Rotel/tomatoes (do not drain), lime twist, and seasonings in blender with peppers on the bottom to ensure the blend correctly. Pulse only until you can see peppers have blended. You want it to be chunky, not runny.

2. Serve with chips or whatever you like. I keep mine in a Tupperware dish with a lid up to a week.

Blueberry Banana Bread Made With Whole Wheat Flour

Standard
Blueberry Banana Bread Made With Whole Wheat Flour

image

My son is a year and a half and I’m always trying to make sure the food he eats is nutrient rich and good for him. He loves banana bread, so I decided to try and make it a little healthier for him and use whole grains, add antioxidant rich blueberries to it, and cut down on the sugar. This bread is perfect to take to a brunch or just to keep around the house for your family to eat. I keep mine covered in cling wrap in the bread pan I baked it in for up to a week in the fridge, and reheat a slice at a time whenever my son is ready to eat it.

Ingredients:
3 bananas
3/4-1 cup fresh or frozen blueberries
2 tablespoons of honey
1 teaspoon vanilla
1 egg
1/2 stick melted butter
1/2 cup sugar
1 1/2 cups whole wheat flour
1 teaspoon baking soda

1. Using a hand mixer on low mix together melted butter, egg, bananas, vanilla, honey, and sugar.

2. Once blended add dry ingredients and blend again using hand mixer.

3. Using a spoon or spatula add 3/4-1 cup of blueberries (depending on how berrilicious you like your bread). Be careful not to break open the blueberries or crush then. It should only take you 3-4 stirs to incorporate them into batter.

4. Pour batter into bread pan that has been sprayed with your favorite non-stick cooking spray. Bake at 350F for one hour.

Favorite Beans

Standard
Favorite Beans

Favorite Beans


Ever since my sister and I were little we always asked for these beans as “favorite beans” because as you have probably already figured out, they are our favorite beans. It’s a great side dish to grilled chicken, grilled pork, burgers, or BBQ and is an easy, cheap way to feed a family or small crowd. The best thing about these beans is you can change up the bean ingredients each time and they are still delicious!

Ingredients:
3 different cans of beans (featured here are Bush’s Grillin Beans “Smoke House Tradition” 22 oz can, Bush’s Best Black Beans 15 oz can, and Bush’s Best Pinto Beans 15 oz can) **I will say I always use a can of Grillin Beans and switch up the other two ingredients because I consider these a staple to this recipe**
1 sweet onion
1 jalapeno
2-3 cloves of garlic chopped
3-4 slices of your favorite bacon
1-2 tablespoons of your favorite BBQ sauce (optional)
Salt and Pepper
Olive Oil

1. I like to use my cast iron skillet for this side dish. If you don’t have one you need to get one because every cook should have a cast iron skillet, but if you must use a regular skillet that’s ok for now 🙂

2. Dice up your sweet onion and slice your jalapeno into rings. Place in saute skillet over medium to high heat with a drizzle of olive oil and season with salt and pepper. Saute for 10-12 minutes or until it starts to caramelize and parts of onion appear golden. (Don’t rush caramelizing the onion because you’ll just burn it. This takes time. Sit down, relax, have a glass of wine. Are you a mom? Leave the stove top for a minute and go see what room of the house your child has destroyed. Hint: all of them)

3. Slice bacon into bite size pieces and throw bacon in at this time. Cook for about 5-7 minutes minutes before throwing in your chopped garlic. Cook another 5 minutes or so. Be careful not to burn the garlic and add olive oil as needed throughout saute process to keep moist.

4. Once bacon has been cooked and onion is fully caramelized, add three cans of beans to the mixture (do not drain beforehand). Turn heat down to low and allow beans to mingle with the yummy onion/jalapeno concoction for a few minutes while stirring to help them along. Give it a taste and see what you think. If you like your beans a little sweeter give them a healthy squirt of your favorite BBQ sauce. Personally, I like to add a squirt of Sweet Baby Ray’s Original BBQ sauce in there to take this dish over the top.

Grilled Chicken Thighs

Standard
Grilled Chicken Thighs

Grilled Chicken Thighs

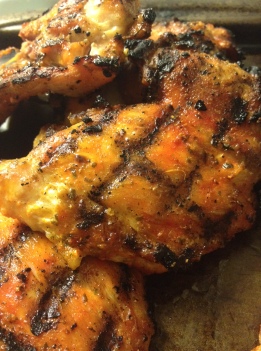
I love grilling chicken thighs and have them at least once a week in our house. I’m always looking for new ways to serve them since we have them so often and on the lookout for tasty new ways to season them. When my parents came back from vacation in St. Martin they were raving about how the French and the Dutch chefs there cooked their BBQ. They use Spanish style seasonings (GOYA brand) on their meat before grilling and the unique blend of seasonings gives the meat a really delicious and different flavor. My parents are foodies and whenever they travel to new places and eat something tasty they almost always find some way back to the chef and get his recipes out of him. I can’t tell you how many times my mom has come back from vacation and spent half the time talking about her vacation telling me about all the new foods they tried and recipes/ideas they’ve brought back. This grilled chicken thigh recipe is so simple anyone can do it and only requires three seasonings.

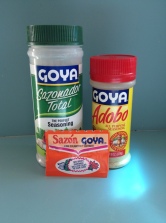
Goya Seasonings

Ingredients:
GOYA brand Sazonador Total “The Perfect Seasoning”
GOYA brand Adobo “All Purpose Seasoning With Pepper”
GOYA Sazon “Con Culantro y Achiote” (This comes in a small box with little packets of seasonings inside the box. Note which flavor used here because there are several different ones.)
1 package boneless skinless chicken thighs

1. I like to season my chicken first thing in the morning after I wake up so the chicken has all day to marinate in this yummy goodness before I grill it. It’s not 100% necessary, but it sure does make a difference in taste I think. I like to line a cookie sheet with foil and spray with cooking spray and season both sides of the chicken liberally with all three seasonings. Once both sides of chicken are seasoned cover with plastic wrap and place in the fridge until ready to grill. **Note** Use 1/2 of Sazon packet on one side of the chicken, 1/2 on the other.

2. Once your chicken is ready to cook you have a couple different options:
– Get your grill going and either cook on grates of grill or cook on foil piece chicken has been sitting on that has been sprayed with cooking spray. Cooking directly on grates will leave grill marks and give the outside a little crustier texture and cooking on the foil will leave chicken slightly juicier and no grill marks. It’s really up to you how you like your chicken.
– If you don’t have a grill you can cook this in the oven leaving chicken on foil and cookie sheet at 425 for about 40-45 minutes.

Whatever you do, don’t overcook your chicken. Boneless skinless chicken thighs are some of the tastiest and juiciest cuts of meat and the worst thing you can do is overcook it. Keep an eye on your chicken and cut into it to see if it’s finished. I’ve never once checked the temp of my chicken (I don’t even own a thermometer) but if you feel so inclined the temp the FDA recommends chicken to be is 165 F. However, once you take the chicken off it will “carry over” cook which means the temp will continue to rise and cook on the inside even though you have taken it off the heat. So if you’re standing there with your thermometer take it off at about 160 so it doesn’t cook too much and dry out. If you’re like me and not going to do any of that, do it the simple way and just cut into a piece of chicken as a test piece and see if it’s done. If so, have a little snack, no one’s lookin 🙂

Crispy Fried Chicken Made With Whole Wheat Flour

Standard
Crispy Fried Chicken Made With Whole Wheat Flour

Crispy Fried Chicken Made With Whole Wheat Flour

I’m so excited for this fall weather and all the yummy foods that go with it. I love making a yummy dinner of fried chicken with mashed potatoes, and this recipe is slightly healthier than most fried chicken recipes because it uses whole wheat flour versus white flour. It’s better for you and you really cannot tell a difference whatsoever in taste.

The key to juicy and tender fried chicken is to marinate it in buttermilk. I usually marinate mine overnight in a ziplock bag that I place in a bowl in the refrigerator but if you start marinating the morning of the day you’re going to cook it that’s alright too. Pour just enough buttermilk in there to cover whatever you’re cooking. This recipe cooked 10 chicken thighs for me and I purchased one of those value sized Pilgram’s Pride chicken thigh packages which is roughly 2 1/2 lbs of chicken. You can substitute your favorite cut of chicken (breast, tenders, drumsticks, wings) in place of the thighs for this recipe. Whatever cut you get I highly recommend you get with skin and bone because the skin helps the batter stick and makes for a tastier crust. However, for a lower calorie idea use tenders which are boneless and skinless.

Ingredients:

Roughly 2 1/2 pounds of your favorite chicken cut (this recipe used 10 thighs with bone/skin)
Buttermilk (I used 1/2 a quart to marinate all the thighs)
4 cups whole wheat flour
1 tablespoon each of garlic salt, paprika, and pepper
Your favorite frying oil (I like to use sunflower oil because it’s better for you to fry foods in – see http://www.medicalnewstoday.com/articles/240753.php)

1. Pour enough oil in a pot or dutch oven so that it rises 1-1 1/2 inches from the bottom. Heat just slightly above medium heat on your stove top. If you’re the technical type with a thermometer you want to get the oil to 350 degrees. Note: you never want to pour oil more than halfway up whatever you’re frying in – this is how oil bubbles over and kitchen fires happen!

2. In a ziplock bag combine flour and seasonings and shake well. Once distributed place 3-4 pieces of chicken in the flour and shake well until chicken pieces are well covered with flour.

3. Once your oil is heated properly (I always dust a little flour mix into oil and see if it starts frying/bubbling since I never use a thermometer) get your chicken pieces ready to drop in by shaking off any excess flour. Place 3-4 pieces of chicken in and allow to fry for 10 minutes or so until you flip to the other side. You’ll want to make sure you’re not overcrowding your pan because this can cause the temperature to drop and then you won’t get a crispy crust. It will take anywhere between 15-30 minutes to fry your chicken based on the size and density of the pieces you’re cooking. For example, a chicken wing will be finished much faster than a chicken breast or thigh. Also whenever a bone is in the chicken it will take longer to cook as well.

4. Once your chicken is done (I always just take out a piece and cut into it to see if it’s done, but again if you’re the technical type with a thermometer the temp you’re looking for is 165 F) take out and place onto a baking sheet lined with paper towels to allow it to drain. Salt immediately with a pinch of salt and place in your oven at 200 F to keep warm. This will keep crust crispy if you’re cooking several batches of chicken before serving.