Tag Archives: jalapeño

Duke’s Jalapeño Havarti Sliders

Standard
Duke’s Jalapeño Havarti Sliders

Duke's Jalapeño Havarti Sliders

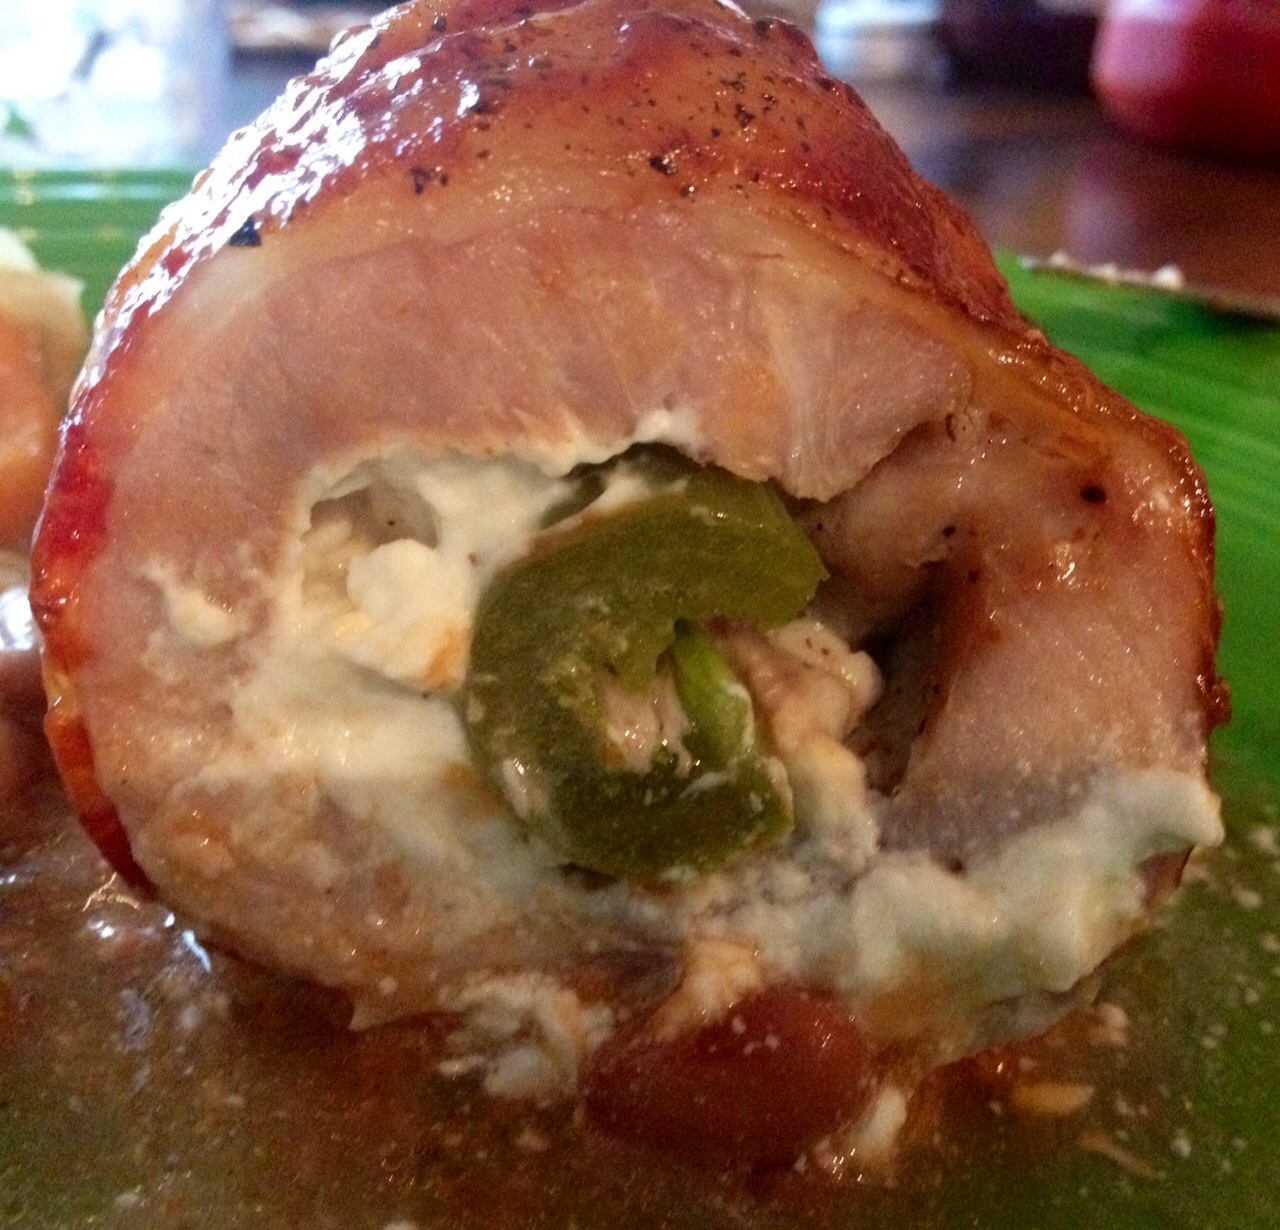
You may or may not have drawn the logical conclusion that I’ve had a thing for sliders this pregnancy. It’s true! I’m currently obsessed with sliders and have made them several different ways, but I think this one is my favorite! This recipe uses ground turkey and deliciously creamy Havarti cheese, and they’re heavenly. Can’t find Havarti cheese? Pepper jack would work great here too.

Ingredients:
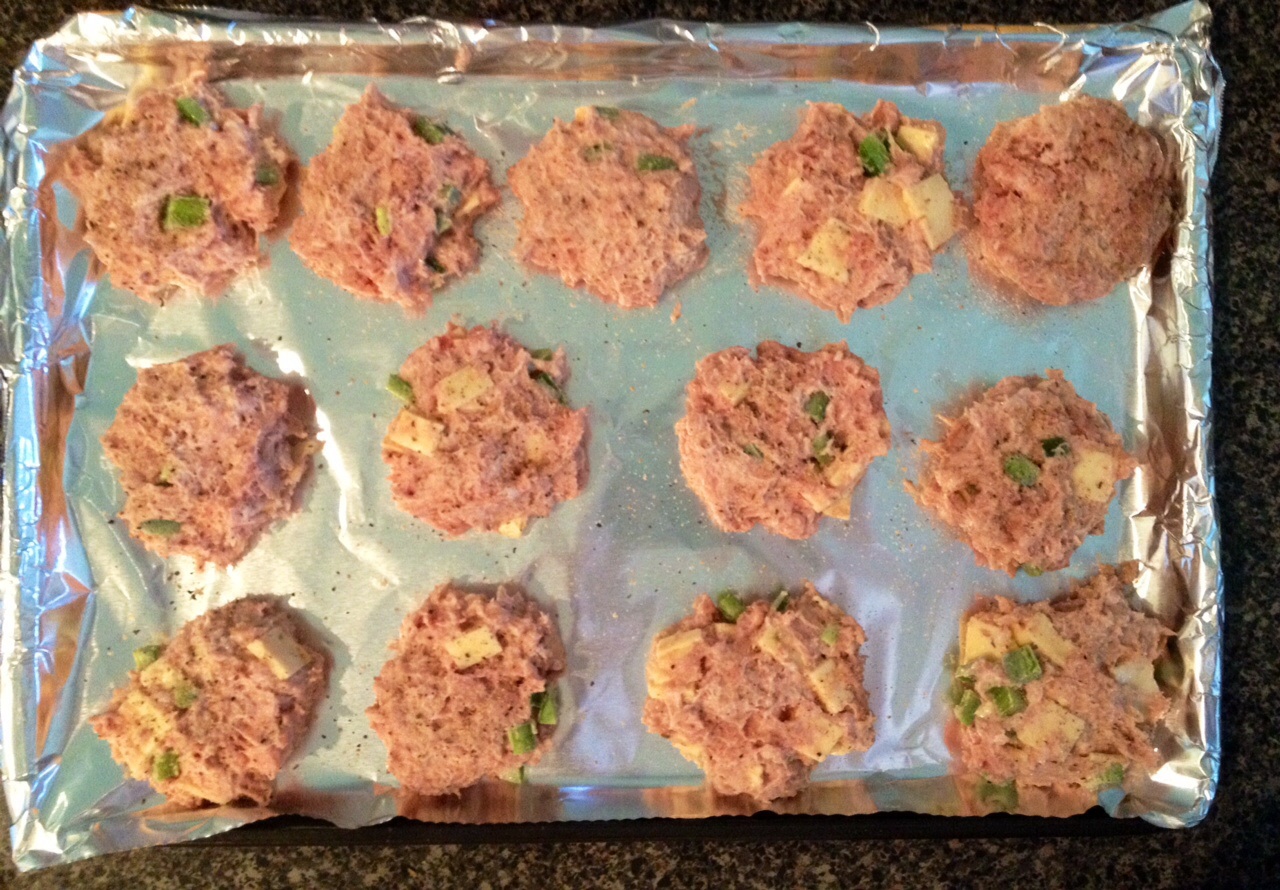
1 package ground turkey (the one I bought was 19 oz, so slightly over a pound)
1 chopped jalapeño (seeded and deveined)
About 1/4 c cubed jalapeño Havarti cheese
Your favorite burger seasoning
1 heaping T Duke’s mayonnaise

1. Combine mayo, ground turkey, jalapeños, cheese, and seasonings in a mixing bowl. I added about a tsp of seasoning into this mix, then sprinkled a little more on each patty after they were assembled. It’s important to note that every Southerner knows that Duke’s mayo is the best mayo you can buy and blows Hellman’s out of the water, so I highly suggest that’s what you use. However, if you can’t find it, any mayo you find will work.
image
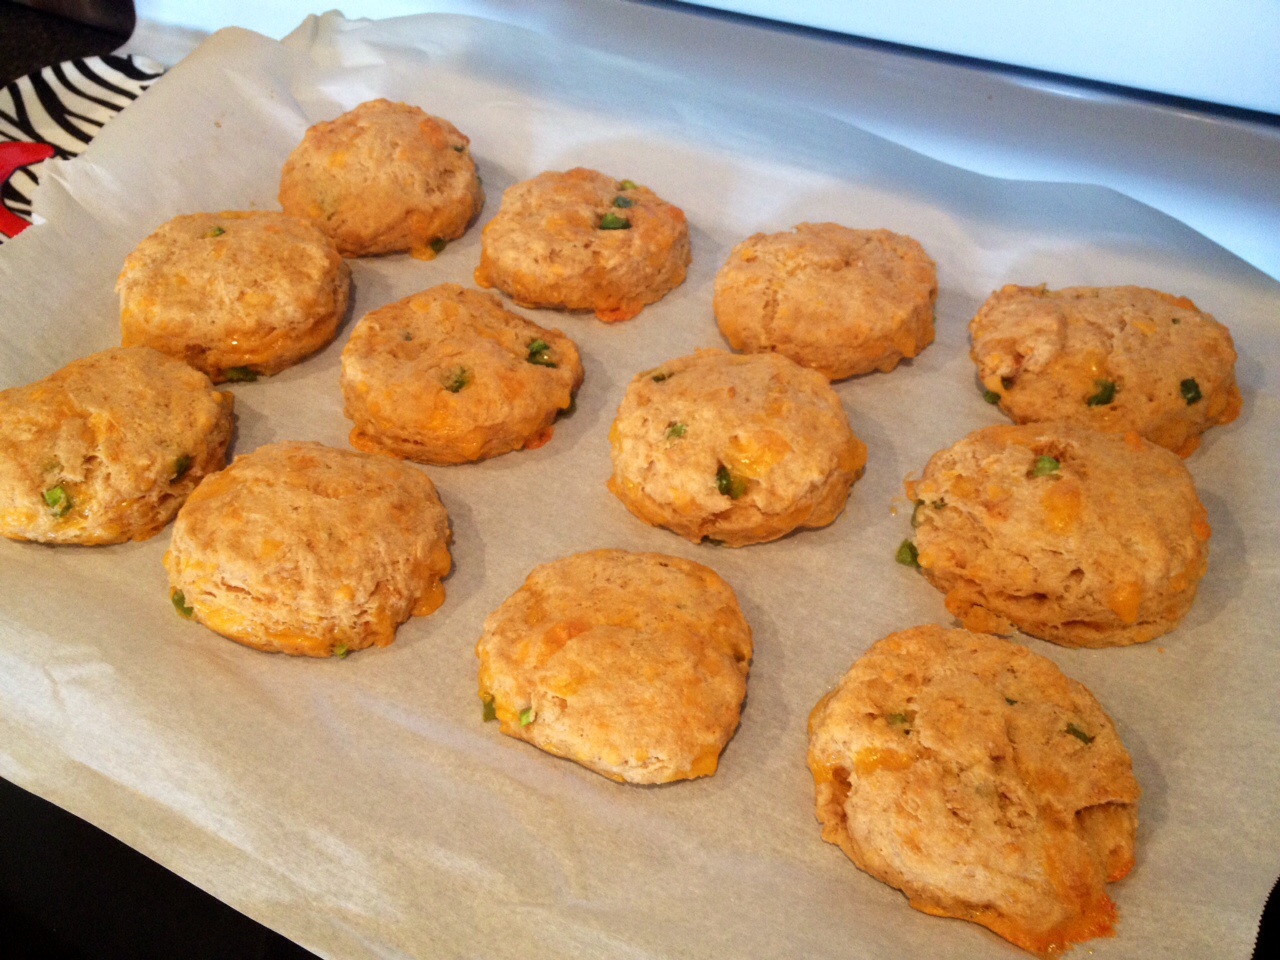
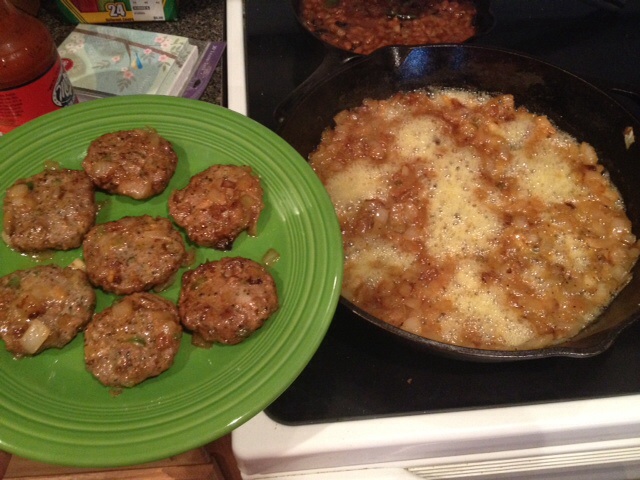
* That one on the top right is plain for my 2 year old 🙂

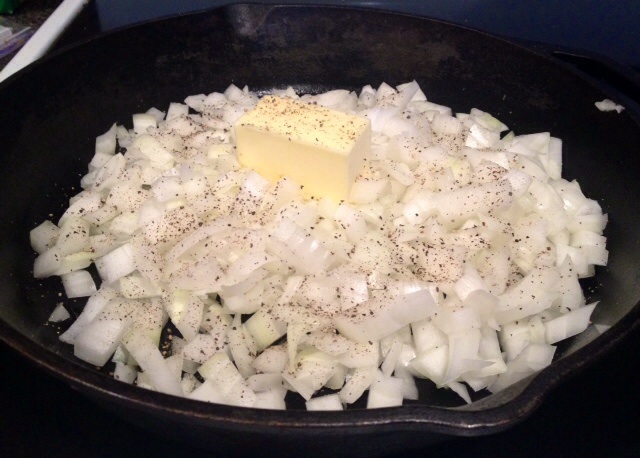
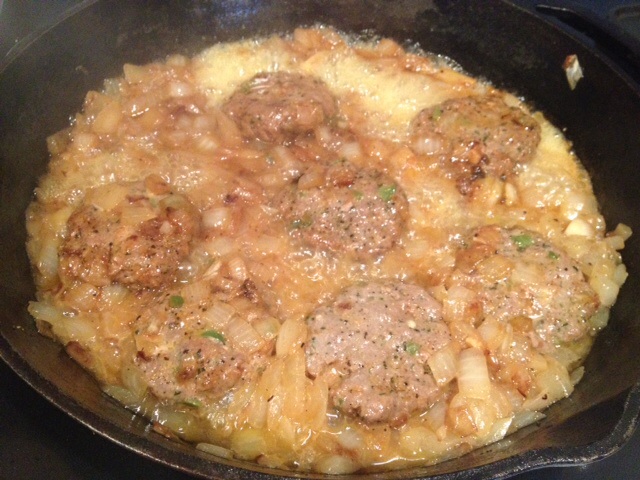
2. You can either grill these or cook them on your stovetop. You may have heard me mention I live in a wind tunnel with a vortex that threatens to suck me up every time I step outside to approach my grill, so I did these on the stovetop. Don’t forget to spray your pan like I did, because these puppies stick!
image

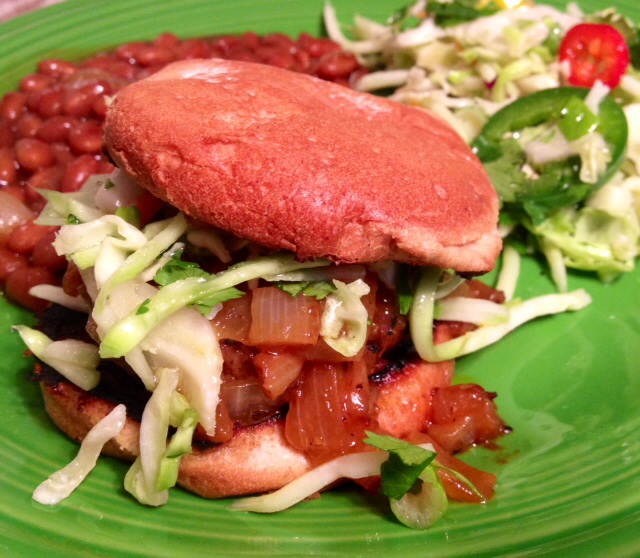
3. Prepare yourself for the juiciest and most delicious slider ever! I highly recommend serving on a toasted slider bun with a kicked up creamy coleslaw and sliced garden tomato. For a quick coleslaw that’s only semi-homemade I used a creamy coleslaw mix and added a spoonful of Duke’s mayo to the mix, a splash of white vinegar, cayenne pepper, and salt & pepper. It really made it taste like it was totally from scratch and incorporated the Duke’s mayo theme I was going for. Yum! Duke's Jalapeño Havarti Sliders

Pork Chop Grenades

Standard
Pork Chop Grenades

Pork Chop Grenades

This is one of those summer hits that people will be wanting your recipe for. A few years ago, I saw a recipe on one of those recipe chain Facebook posts for stuffed chicken breasts that used these same stuffing ingredients, and thus, eventually the pork chop grenade was born. At first, I made this recipe using chicken thighs, but it has expanded to the “other white meat”, and I’ve gotta say it’s pork perfection! But feel free to sub chicken or even pork tenderloin in place of a pork chop here – it really is versatile!

Ingredients:
Pork chops or pork steaks with bones removed
BBQ sauce (I used Sweet Baby Rays here)
1-2 strips of bacon per grenade
1/2 jalapeño sliced per grenade
Your favorite grilling seasoning or just plain salt and pepper
About 1 T cream cheese per grenade

1. This recipe graduated from chicken to pork because these bone-in pork steaks were on sale for a steal at the store. See what being a savvy shopper can do for you? 🙂 I just cut out the bones of the steaks before using them. Obviously, the easiest thing would be to buy thin cut boneless pork chops.
image

2. Sprinkle your favorite grilling seasoning on your meat and put about a tablespoon of cream cheese on each chop.
image

3. Using either the back of a spoon or your fingers, mush the cream cheese out a little bit and place 1/2 a jalapeño on each. I like to keep a few seeds and stems in mine to keep them spicy! Please excuse the blurry pic 🙂
image

4. Now here is the messy part! You’re going to wrap these up into grenades using 1-2 slices of bacon each. Try to seal them up with the bacon because it helps keep the stuffing inside. I like to do a little fresh cracked black pepper on top of the bacon because it’s delicious and it looks pretty.
image

5. Now you can decide to either bake or grill these. Normally, I grill mine but now that I’m living in Amarillo AKA the US’s windiest city , I don’t particularly enjoy grilling in gale force winds, so I bake them. I use a grilling sheet I’ve sprayed with non-stick spray on top of a cookie sheet/jelly roll pan lined with foil for easy cleanup. Bake at 375 for anywhere from 45-60 minutes based on the thickness of your meat. Then take them out and turn the heat up to 400 or crank the grill up.
image

6. Now you’re going to baste them with your favorite BBQ sauce and put back in for 10-15 minutes. Again, you don’t want to overcook them, so keep in mind the thickness of your meat before you cook it.
image

7. Your grenades are ready to eat! Let’s cut into one of these babies and check out that creamy spicy perfection!
image
image

Jalapeño Cheddar Biscuit Sandwiches

Standard
Jalapeño Cheddar Biscuit Sandwiches

Jalapeño Cheddar Biscuit Sandwiches

Have y’all seen that Whataburger commercial with the jalapeño cheddar biscuit? That’s what I’ve been dreaming about for weeks now, and being pregnant hasn’t done anything to help distract my cravings. However, in the spirit of being quasi-healthy and definitely easier on the pocketbook than daily stops to Whataburger, I decided to make these from scratch and with whole wheat flour. Also, I made a bunch of these and wrapped them in plastic wrap once they cooled and put them in a big ziplock in the freezer so I can take them out one at a time for my husband’s breakfast on the go. Go me! This recipe makes about 2 dozen biscuit sandwiches.

Ingredients:
4 cups of flour
1 T plus 2 tsps baking powder
1 tsp salt
3/4 c cold butter
1/2 tsp cayenne pepper
1 tsp paprika
2 jalapeños seeds and stems removed
10 oz shredded sharp cheddar cheese
2 c buttermilk
2 packages of your favorite breakfast sausage cut into patties

1. First, let’s talk about your flour. If you want to use good ‘ole white bleached flour because it’s delicious, go ahead. Also, it looks prettier than whole wheat flour. I like this kind because it’s less whole wheat more normal looking. The King Arthur Brand is what I recommend whatever flour you end up using.
image

2. Start fryin up your sausage. If you’re brand new to cooking breakfast sausage, you should know it’s much easier to slice the colder it is, and also use the tick marks on the plastic packaging to help cut uniform slices.
image

3. Combine your cold butter into the flour and other dry seasonings using a pastry blender. Now, if you’re like me and misplaced your pastry cutter along with other important things you rarely need but can never seem to find when you need them, dice up your butter with a knife into pea sized pieces before cutting it into the butter with a fork. Also, add pastry cutter to your shopping list. Then add your cheese, jalapeños, and buttermilk. Combine it all together.
image

4. You’re going to have a fairly wet loose dough, but that’s ok because you’re going to knead it on a slightly floured surface. Once you’re happy with the dough, roll (or use your hands – seriously does anyone still have rolling pins?) your dough into about a 3/4 – 1 inch thickness.
image

5. Next, get your handy dandy biscuit cutter (or top of a drinking glass if you don’t have one) and start cuttin’ them biscuits!
image

6. Have you been keeping an eye on your sausage patties? I hope so! Don’t forget to drain them on a paper towel. Also, keep that oil at the bottom of your pan to make a delicious gravy for these biscuits if you really want to be bad. (Does my hypocrisy know no bounds?)
image

7. Pop these puppies into a 400 degree oven for 15-18 minutes depending on how hot your oven gets and how evenly it cooks. Every oven is different, so just be sure to keep an eye on them towards the end.
image

8. Your biscuits are done! Now just add your sausage patties to them to complete the sandwiches. If you like extra cheese (who doesn’t?) slap on a slice of American or add a fried egg on top of your patty. The possibilities are endless!
image

BBQ Sliders With Caramelized Onions

Standard
BBQ Sliders With Caramelized Onions

BBQ Sliders With Caramelized Onions

Hello! I am so glad to get to post this yummy recipe just before Memorial Day Weekend! I’ve been so busy lately with our big move to Amarillo I’ve hardly had time to cook anything worth posting a recipe for, but we are settled in now, so hopefully I can get back in the swing of things. Ok, let’s get started!

First, I want to be honest up front and say I bought the patties for these sliders from the butcher in our grocery store. A) I’m tired and need all the help I can get and B) They looked delicious. They’re jalapeño cheddar sliders, but any kind of slider you want to use here would be delicious. Just be sure to sprinkle a little of your own favorite seasoning on both sides before you use them. Also, tell everyone you made them from scratch and throw away the evidence before anyone else eats them. It’ll be our little secret 😉
image

Ingredients:

2 large sweet onions (1015, Honey Sweets, Videlia, whatever…)
1/2 stick of butter
7-8 sliders seasoned with your favorite burger seasoning
Your favorite BBQ sauce (for this recipe I used a spicy one)
Salt and pepper
Water
Slider buns

1. Dice up your onion and throw it into your large cast iron skillet. If you don’t have a cast iron skillet, consider yourself scolded and just use a normal skillet for now, but buy one as soon as possible. Season with salt and pepper and throw your 1/2 butter stick in there. Sauté about 15 minutes on medium to high heat.
image

2. After the onions are mostly Caramelized and smelling delicious, add your patties to the skillet right there on top of the onions and add about 1/2 cup of water. It’s going to steam those yummy patties.
image

3. I like to put a lid on at this point because it helps the steam. Check out my beautiful silicone flower lid! (You can use any lid that doesn’t seal)
image

4. Flip the patties after a few minutes and place the lid back on. After about 8-10 minutes, they’re essentially done with the high heat. Take the patties and set them aside for a minute on a plate.
image

5. Now stir those onions around and give them a give them a few healthy squirts of your favorite BBQ sauce. Turn the heat on low and after the BBQ sauce has been incorporated, add your patties back in and let them simmer in that yummy deliciousness for at least ten minutes before serving.
image

6. Serve these little medallions from heaven on toasted slider buns and top with your onion mixture. Personally, we like to add my Texas Coleslaw recipe on top and serve with a side of
favorite beans.
image Notice I somehow ended up with the two bun bottoms instead of a top and bottom. Typical.

Roasted Vegetables

Standard
Roasted Vegetables

Roasted Vegetables

These roasted veggies are super delicious and very good for you. I’ve done virtually every veggie combo in this recipe, but these were what I had in my fridge: yellow squash, zucchini, asparagus, sweet potato, purple potato, sweet onion, Brussels Sprouts, jalapeño, sweet peppers, and green onion. Other veggies I love in here are cauliflower, broccolini, cherry tomatoes, carrots, whole garlic cloves, and bell peppers. The next day I love to chop any leftovers up and add to seasoned quinoa and add a can of drained black beans for dinner.

Ingredients:
Sliced vegetables
Olive oil
Seasoning
1-2 T of butter (optional)

1. Cut up all your veggies and arrange on a sheet pan lined with foil (helps with cleanup later).
Cut Veggies

2. Drizzle olive oil all over veggies on the pan and add your little pats of butter if you’re using it. Then season liberally with salt and pepper. I also love to use Tone’s Garlic Herb (salt free) seasoning on my veggies, but you can use virtually any seasoning you like, just make sure there isn’t any salt in it, and if there is omit adding additional salt.
Seasoning

3. Place veggies in the oven at 425F for one hour. Be sure to stir veggies around about halfway through to ensure even cooking.
image

4. Veggies will be soft and roasted perfectly at an hour, but you can leave in a little longer if you like them browner. image

Breakfast Hash

Standard
Breakfast Hash

-8

What else can I say about this breakfast that doesn’t tell you it for itself after seeing this picture? It’s delicious and has no calories whatsoever! Ok, so that’s a lie, but come on, who cares once you taste this delicious concoction!

Ingredients:
3 medium red potatoes chopped
1 sweet onion chopped
A few sweet peppers chopped (optional – you can leave out or use a bell pepper if you don’t have sweet peppers)
6-8 slices of bacon chopped (I just used what I had leftover in my package of bacon. Feel free to use an entire package for this!)
1 jalapeno chopped (if you don’t like the heat, remove the stems and seeds, or just use half)
1 garlic clove chopped
2 T butter
Olive oil
Salt and pepper
1-2 fried eggs per person (this made enough for 2 of us to have large servings)
Shredded cheese and Louisiana hot sauce for garnish

1. Saute onion and peppers in butter and olive oil for about 15 minutes on medium to high heat.
-9

2. Add bacon and chopped potatoes, and saute another 5 minutes before adding chopped garlic. Season with salt and pepper.
-10

3. Fry up your eggs in a separate skillet (1-2 per person). As a good southern girl, I keep a bowl of bacon grease on hand by my stove top for occasions such as this where I need to fry an egg in bacon grease. Don’t you dare try to tell me an egg “fried” in a skillet with Pam is fried. That’s blasphemous and may God have mercy on your soul! However, should you like your eggs sunny side up, you can add them later and cook on your skillet under the broiler later if you’d like.
-11

4. Put several healthy spoonfuls of your delicious hash into a bowl and top with your friend egg. Then garnish with cheese, Louisiana hot sauce, or whatever else you like. -6
-7

Spicy Chili

Standard
Spicy Chili

image

Yesterday when I woke up it was cold and foggy outside, and that’s when I knew for sure, beyond a shadow of a doubt… It was a perfect day for chili! This chili has the perfect amount of kick and goes perfectly on baked potatoes (pictured), tamales, Fritos, French fries, or even by itself. Trust me, you could put this on an old leather boot and it would be delicious!

Ingredients:
2 lbs ground meat (beef, turkey, deer, whatever you like)
1 large sweet onion chopped
1 large jalapeño chopped
3 cloves of garlic chopped
1 12 oz beer (I used a Miller Lite, but any beer dark or light would be ok. Rule of adding drinks like this to food is if you wouldn’t drink it, don’t put it in your food. That means don’t buy the cheap stuff.)
1 can Rotel
1 cup Spicy V8 juice
3 tablespoons chili powder
2 teaspoons each of garlic salt, paprika, and cumin powder
1/4 teaspoon cayenne
1/4 cup ketchup (Heinz ketchup is my favorite)
1 tablespoon yellow mustard (I love French’s)
Olive oil
Salt and pepper to taste

1. Add onion and peppers to pot and drizzle with olive oil and season with salt and pepper (go easy because you can always add more later, but you can’t take it out once you’ve added it). Sauté for 20 minutes on medium to high heat.

2. Add ground meat and chopped garlic and sauté until fully cooked. Add seasonings and stir well. At this point you can either keep in pot or transfer to crock pot on low.

3. Add beer, Rotel, V8, ketchup, and mustard and keep at a simmer on stovetop or crockpot for a few hours or even all day.

4. Garnish chili with your favorite toppings before serving. Classic chili toppings include onion, green onion, cheese, sour cream, and avocado.