Tag Archives: Cook

Chicken Parmesan

Standard
Chicken Parmesan

Chicken Parmesan

I’m sure most of you are used to your traditional breaded and fried Chicken Parmesan, but this is a baked version. Read: I did not say this was recipe is better for you, but we can pretend I did if that makes you feel better 🙂 As I was saying, this recipe is less mess and so much tastier than the traditional version! So crack open a red and let’s get started!

Ingredients:
1 package boneless skinless chicken thighs
1 cup REAL mayo
1/2 cup Italian breadcrumbs divided
1/2 cup shredded Parmesan cheese (Notice I said shredded, not that imitation grated stuff on the shelf)
1 cup shredded mozzarella cheese
Salt and pepper

1. In a mixing boil combine mayo, 1/4 c Italian breadcrumbs, and Parmesan cheese.
image

2. Place your chicken on a cookie sheet that’s been lined with foil and sprayed with nonstick spray. Season with salt and pepper. Then spread your mayo mixture evenly over the chicken.
image

3. Sprinkle remaining Italian breadcrumbs over the chicken.
image

4. Place chicken in a 375F oven for 40 minutes.
image

5. Pull chicken out after about 40 minutes and sprinkle mozzarella all over the chicken. Put back in the oven for another 5 minutes.
image

Serve with whole wheat angel hair pasta, marinara sauce, and cheesy garlic bread for a delicious dinner!

Cream Cheese Chicken Enchiladas

Standard
Cream Cheese Chicken Enchiladas

Chicken Enchiladas With Cream Cheese Sauce

So, once again I had leftover grilled chicken and needed to do something with it, plus I had a request for a chicken enchilada recipe, so naturally I made my delicious cream cheese chicken enchiladas. Back in college, my friend Jill used to make her chicken enchiladas very similar to this recipe, and I’ve taken it and done things a little different with it. Actually, many things are different from when I was back in college, like how much I can drink and how late I can stay up, but that’s neither here nor there. I love the cream cheese sauce instead of a sour cream sauce and think these are so yummy! Also, I’ll go ahead and say I ran out of shredded cheese (in our family we call this “sprinkle cheese”) at the end, so I didn’t have nearly as much cheese on top of the enchiladas as I would’ve liked. It was a Great American Tragedy lemme tell ya, but they were still tasty 🙂

Ingredients:
2-3 cups of chicken chopped, sliced, shredded, whatever (Don’t make this part hard on you – use leftover chicken, a store bought rotisserie chicken you picked apart with your hands, or pan sear some chicken and chop it up in your kitchen)
1 1/2 cups salsa (Yes, you can use store bought salsa if you’d like. However, I’d suggest adding some chopped cilantro to it since they never have that fresh taste to them)
2 8 oz packages cream cheese
1 can Rotel
2 cans diced green chiles (I like the Hatch brand hot ones, but mild is fine too)
1/4 tsp garlic salt
Pepper to taste
1 dozen tortillas
At least 1 cup shredded cheese

1. Place your cream cheese in a pot over the stove on low heat. Don’t rush this because it burns easily. Keep stirring it around until it’s smooth and creamy like this.
-12

2. After it’s melted and creamy, add your salsa, Rotel, chiles, garlic salt, and pepper to cream cheese and stir. Taste the now pinkish mixture to see if you want to add more salsa to it or if you like it how it is. Keep on low to medium heat.
-13

3. Take one cup of the cheese sauce and pour over your chopped/sliced/shredded chicken. It will now sort of look like the most delicious chicken salad you’ve ever seen in your life! -14
-1

4. Spray a 9×11 baking dish with non-stick spray and preheat your oven to 350. Start to fill up your tortillas with about two spoonfulls each of chicken mixture.
-2

5. As you’ve heard me say before, I like corn tortillas and my husband likes flour, so I had him come in and help hold down the corn ones because they’re a little tricky sometimes.
-3

6. Pour the cheese sauce all over the enchiladas and make sure to spread it out so it covers the entire baking dish and there aren’t any “naked” tortillas.
-4-5

7. Sprinkle as much shredded cheese as you like all over the enchiladas.
-6

8. Bake in a 350F oven for 20-30 minutes or until cheese is melted and sauce is bubbly 🙂-7

Chicken Quesadillas

Standard
Chicken Quesadillas

Chicken Quesadillas

Take a look at this little beauty! That is the delicious inside of my chicken quesadillas before I put the top on. I usually use whatever meat I have leftover in my fridge (steak, chicken, pulled pork, etc), and in this case I used leftover grilled chicken.

Ingredients:
1 sweet onion chopped or sliced, whatever you prefer
Several sweet peppers sliced into rings or 1 bell pepper sliced
1 jalapeño sliced into rings
1 garlic clove chopped
2 T butter
Olive oil
Salt and pepper
Chopped meat of your choice (about 1/2 cup per quesadilla)
Mixed shredded cheese
Tortillas

1. Put your peppers, onions, salt, pepper, drizzle of olive oil, and butter in a skillet. Sauté about 15 minutes on medium to high heat, then add garlic and sauté another five minutes. Peppers and onions

2. In a different skillet you can either drizzle a little olive oil in it or rub with a little butter to get it ready for the tortilla. Place tortilla in, sprinkle with one layer of cheese, and put as much meat and veggies as you want on there.
Chicken Quesadillas

3. Put another layer of cheese on top of the meat and veggies and put another tortilla on top. *Note* I used flour for my husband and corn tortillas for me. I let them cook a little longer in a little extra butter and got it nice and crispy. Let me tell ya, it was delicious!
image

4. Flip that bad boy over and allow both sides to become deliciously golden. That was so easy, I bet you didn’t even have to set your wine glass down!
image

Breakfast Hash

Standard
Breakfast Hash

-8

What else can I say about this breakfast that doesn’t tell you it for itself after seeing this picture? It’s delicious and has no calories whatsoever! Ok, so that’s a lie, but come on, who cares once you taste this delicious concoction!

Ingredients:
3 medium red potatoes chopped
1 sweet onion chopped
A few sweet peppers chopped (optional – you can leave out or use a bell pepper if you don’t have sweet peppers)
6-8 slices of bacon chopped (I just used what I had leftover in my package of bacon. Feel free to use an entire package for this!)
1 jalapeno chopped (if you don’t like the heat, remove the stems and seeds, or just use half)
1 garlic clove chopped
2 T butter
Olive oil
Salt and pepper
1-2 fried eggs per person (this made enough for 2 of us to have large servings)
Shredded cheese and Louisiana hot sauce for garnish

1. Saute onion and peppers in butter and olive oil for about 15 minutes on medium to high heat.
-9

2. Add bacon and chopped potatoes, and saute another 5 minutes before adding chopped garlic. Season with salt and pepper.
-10

3. Fry up your eggs in a separate skillet (1-2 per person). As a good southern girl, I keep a bowl of bacon grease on hand by my stove top for occasions such as this where I need to fry an egg in bacon grease. Don’t you dare try to tell me an egg “fried” in a skillet with Pam is fried. That’s blasphemous and may God have mercy on your soul! However, should you like your eggs sunny side up, you can add them later and cook on your skillet under the broiler later if you’d like.
-11

4. Put several healthy spoonfuls of your delicious hash into a bowl and top with your friend egg. Then garnish with cheese, Louisiana hot sauce, or whatever else you like. -6
-7

Pantry Soup

Standard
Pantry Soup

-5

Every week (or just about) I make this soup with leftovers from what I’ve cooked the few days before. I call it “pantry soup” because it’s something you can use almost anything in your pantry for, and super simple to make. Usually, I take whatever leftover meat (grilled chicken in this case, but feel free to use grilled pork, leftover steak, or keep it vegetarian and leave out the meat which I do as well sometimes) and add it to a plethora of vegetables and seasonings from my freezer/pantry and serve it over cornbread. It’s super simple and very good! Even my very picky 1 year old loves it.

Ingredients:
Chopped up leftover meat (or none if you’re doing meat free)
1 onion chopped
2 cloves of garlic chopped
1 potato chopped (in this case I used a sweet potato, but I also use red potato, purple potato, or whatever is in my pantry and desperately needs to be cooked before it goes bad)
1 bag of frozen vegetables (in this recipe I used a bag of mixed frozen veggies, but use whatever you’ve got. If you have baby carrots in the fridge chop those babies up and throw in a can of corn. Use whatever you have!)
1 can of beans – do not drain prior to putting in soup – (I used Great Northern Beans here, but use pinto, black, etc.)
1 can of diced tomatoes
1 can diced green chiles
1 tsp Italian seasoning
1 tsp garlic salt
1/4 tsp cumin powder (optional for smoky flavor)
1 chicken bouillon cube
Pepper
About 3 cups of water
Drizzle of olive oil

1. Throw your chopped onion, garlic salt, pepper to taste, and olive oil in a pot and saute on medium high for about 15 minutes. Then add chopped garlic and saute a few more minutes. Then add all your veggies in there. -2

2. Chop up your leftover meat and throw that in there as well. In this case, it was leftover grilled chicken.
-1
-3

3. Add your canned goods to your soup mix, Italian seasoning, cumin powder, chicken bouillon, and water. You want to use enough water that everything is covered by about 1/2 inch. Bring to a boil and let it simmer with the lid on for an hour before serving. I like to serve mine over cornbread and top with chopped green onions and Louisiana hot sauce! Yum!
-4

Roasted Brussels Sprouts

Standard
Roasted Brussels Sprouts

image

If you’re one of those people that thinks they don’t like Brussels Sprouts, I urge you to try this recipe. It’s delicious and goes great as a side to any main course!

Ingredients:
1 container of Brussels Sprouts halved
1/2 stick of butter
Olive oil
Garlic salt, pepper, cayenne pepper

1. Normally, I use a container of Brussels Sprouts for this recipe. However, my grocery store had this bad boy in stock for a steal! So I cut them off the stalk myself.
image

2. Spread Brussels Sprouts halves over a cookie sheet lined with foil (to help with clean up later). Drizzle with olive oil and 1/2 stick of butter sliced into pats. The thing about butter is it makes everything delicious. I’m not a big stickler for how much to use here, so I try to go by this rule: when I think I’ve added enough butter, I add a little more just to be sure! Then season with garlic salt and pepper liberally and a light dusting with cayenne pepper.
image

3. Pop these puppies into a preheated 375F degree oven for about 45 minutes.
image

4. You’ll know they’re done when some of them begin to caramelize and turn golden.
image

Sauted Cabbage

Standard
Sauted Cabbage

-3

This is one of the cheapest, most delicious ways to add a side to your dinner. I dare you to tell me you don’t like cabbage after eating this!

Ingredients:
1 small head of cabbage chopped roughly
1/2 stick of butter
4-6 pieces of bacon sliced into 1 inch pieces
Olive oil
2 cloves of garlic chopped
1/4 tsp red pepper flakes
Pinch of cayenne pepper
Salt and pepper

1. Add cabbage, olive oil, butter, cayenne and red pepper, salt, and pepper to saute pan and set to medium-high heat. Saute for about ten minutes. -1

2. Add chopped bacon and garlic to cabbage. Saute until it looks like this:
-2

3. Bask in the greatness that is cabbage. Wonder why you never ate it before. Sit in the shock that this is cheaper than dirt!

Beef Fajitas

Standard
Beef Fajitas

image

Who doesn’t love a hot and delicious fajita? These are so delicious, and the marinade for the meat is the best I’ve ever tasted. So pour yourself a margarita and let’s get started!

Ingredients:
Skirt steak (you can use flank steak too if you can’t find skirt steak)
1 tablespoon of your favorite fajita seasoning
Juice of 1 lime
1 shot of tequila
1 cup Italian dressing
2 sweet onions sliced
1 bag of sweet peppers sliced into rings
1 jalapeño sliced into rings
2 cloves of garlic chopped
1/2 stick butter
Olive oil
Salt and pepper
Tortillas

1. Combine Italian dressing, lime juice, seasoning, and tequila in ziplock bag. Shake until combined and place your meat in there to marinade at least four hours. I usually do mine the morning of the day I’m cooking them for dinner. Here is a picture of my all-time favorite fajita seasoning:
image
2. Sauté on medium to high heat onions, peppers, butter, olive oil, salt, and pepper in a large skillet until it begins to caramelize. Then add chopped garlic and sauté another 7-10 minutes. It will look like this when it’s ready:
image
3. Throw your fajita meat on the grill and cook until you reach desired doneness. Slice up and serve on warm tortillas and top with sautéed veggies, pico, sour cream, cheese, or whatever else you like on your fajitas. Don’t forget your margarita 🙂

Texas Cornbread Dressing

Standard
Texas Cornbread Dressing

Finished Cornbread Dressing2

With a busy schedule I like to make different parts of Thanksgiving ahead of time and take them out of the freezer closer to the big Turkey Day, so I have less to do when it actually gets here. Dressing is one of the easiest things to make and freeze ahead of time, and I’ll tell you step-by-step how to do it. This is my Mamaw’s recipe she has been making for years. She combined her mother-in-law’s cornbread dressing recipe with another she found in the paper years ago and it is truly the yummiest dressing ever. Let’s get started!

Ingredients:
1 pan of cornbread (you can use your favorite cornbread mix and make as directed on the package – I used Arrowhead Mills Whole Wheat Cornbread Mix)
5 pieces of toasted bread
1 stick of butter
1 sweet onion finely chopped
4 celery stalks chopped
4 hard boiled eggs chopped
1/2 chopped toasted pecans
1 can cream of chicken soup
1 can cream of celery soup
1 1/2 cups of chicken broth
1/4 tsp paprika
1/4 tsp cayenne pepper
1/4 tsp onion salt
1/4 tsp celery salt
1/8 tsp curry powder (we’ll talk about this in a second…)
Salt and pepper to taste

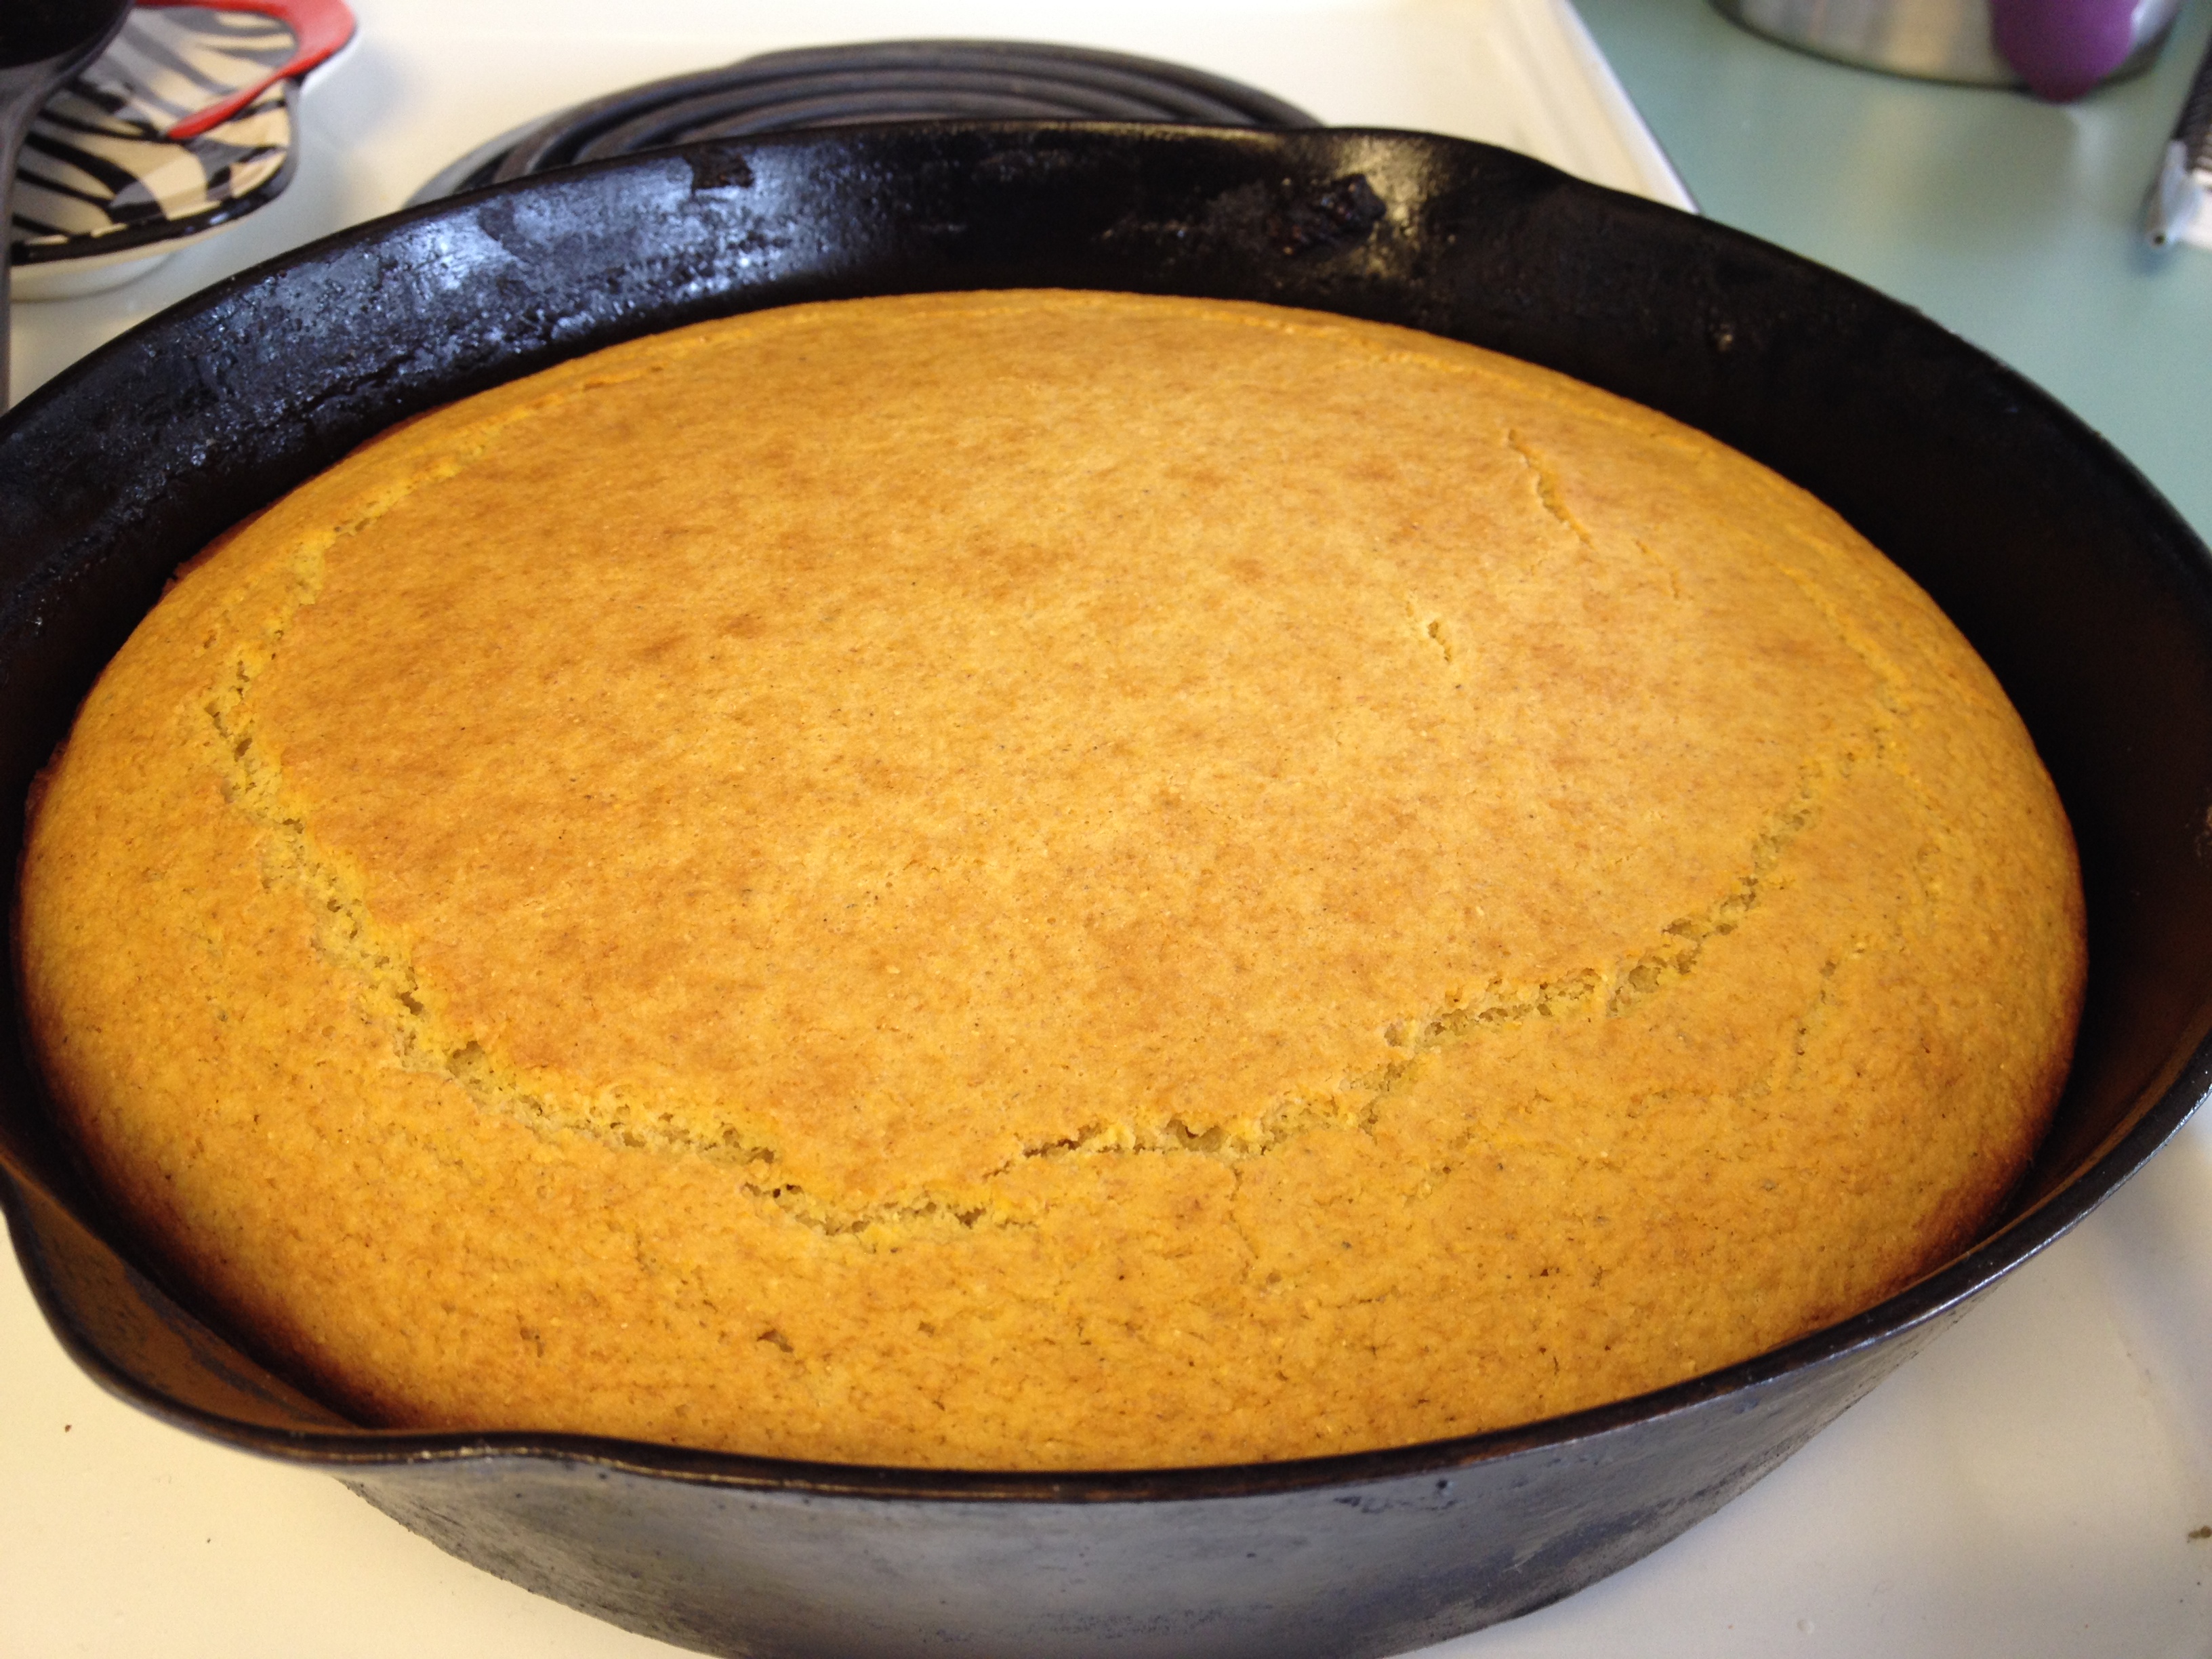
1. First get your cornbread mix going and bake as directed on the box/package. It takes about 30 minutes to get that cooked and another 5-10 to let it cool before handling it so you can get this started while you do everything else. Next, toast 5 pieces of bread so that all pieces are golden and crisp. Once the bread is done, break up with your hands into bread crumbs. It’s ok if they’re all different sizes. We’re in Texas and we’ll call it “rustic” 🙂 Set aside in large mixing bowl.
Cornbread Dressing Seasonings

2. About that curry powder… Yes, I know it’s totally weird but as my Mamaw says “People should just barely be able to taste it and think ‘I wonder what that seasoning is?’ without actually putting their finger on it.” Even though it is such a small amount, it really gives this dish a deeper dimension of flavor. Place onions, celery, butter, and seasonings in a saute pan and cook for about 20 minutes on medium heat. Cue the music, it’s about to get sexy up in here…
Butter and Veggies Cornbread Dressing

3. Once the veggies are getting closer to done, I like to put both soups and chicken broth in a microwave safe container and nuke it for about 40 seconds because I think it makes it easier to whisk them together.
Cornbread Dressing Liquid

4. Is your cornbread done yet? You’ll want to get it out and let it cool for a few minutes before scraping it all out and dumping into the bread crumb mixture. Again, break the cornbread up with your hands into those beautiful rustic breadcrumbs.
cornbread

5. While your veggies are finishing up cooking go ahead and toast your chopped pecans. This only takes a few minutes and the moment you smell them, they are done.
Cornbread Dressing Veggies

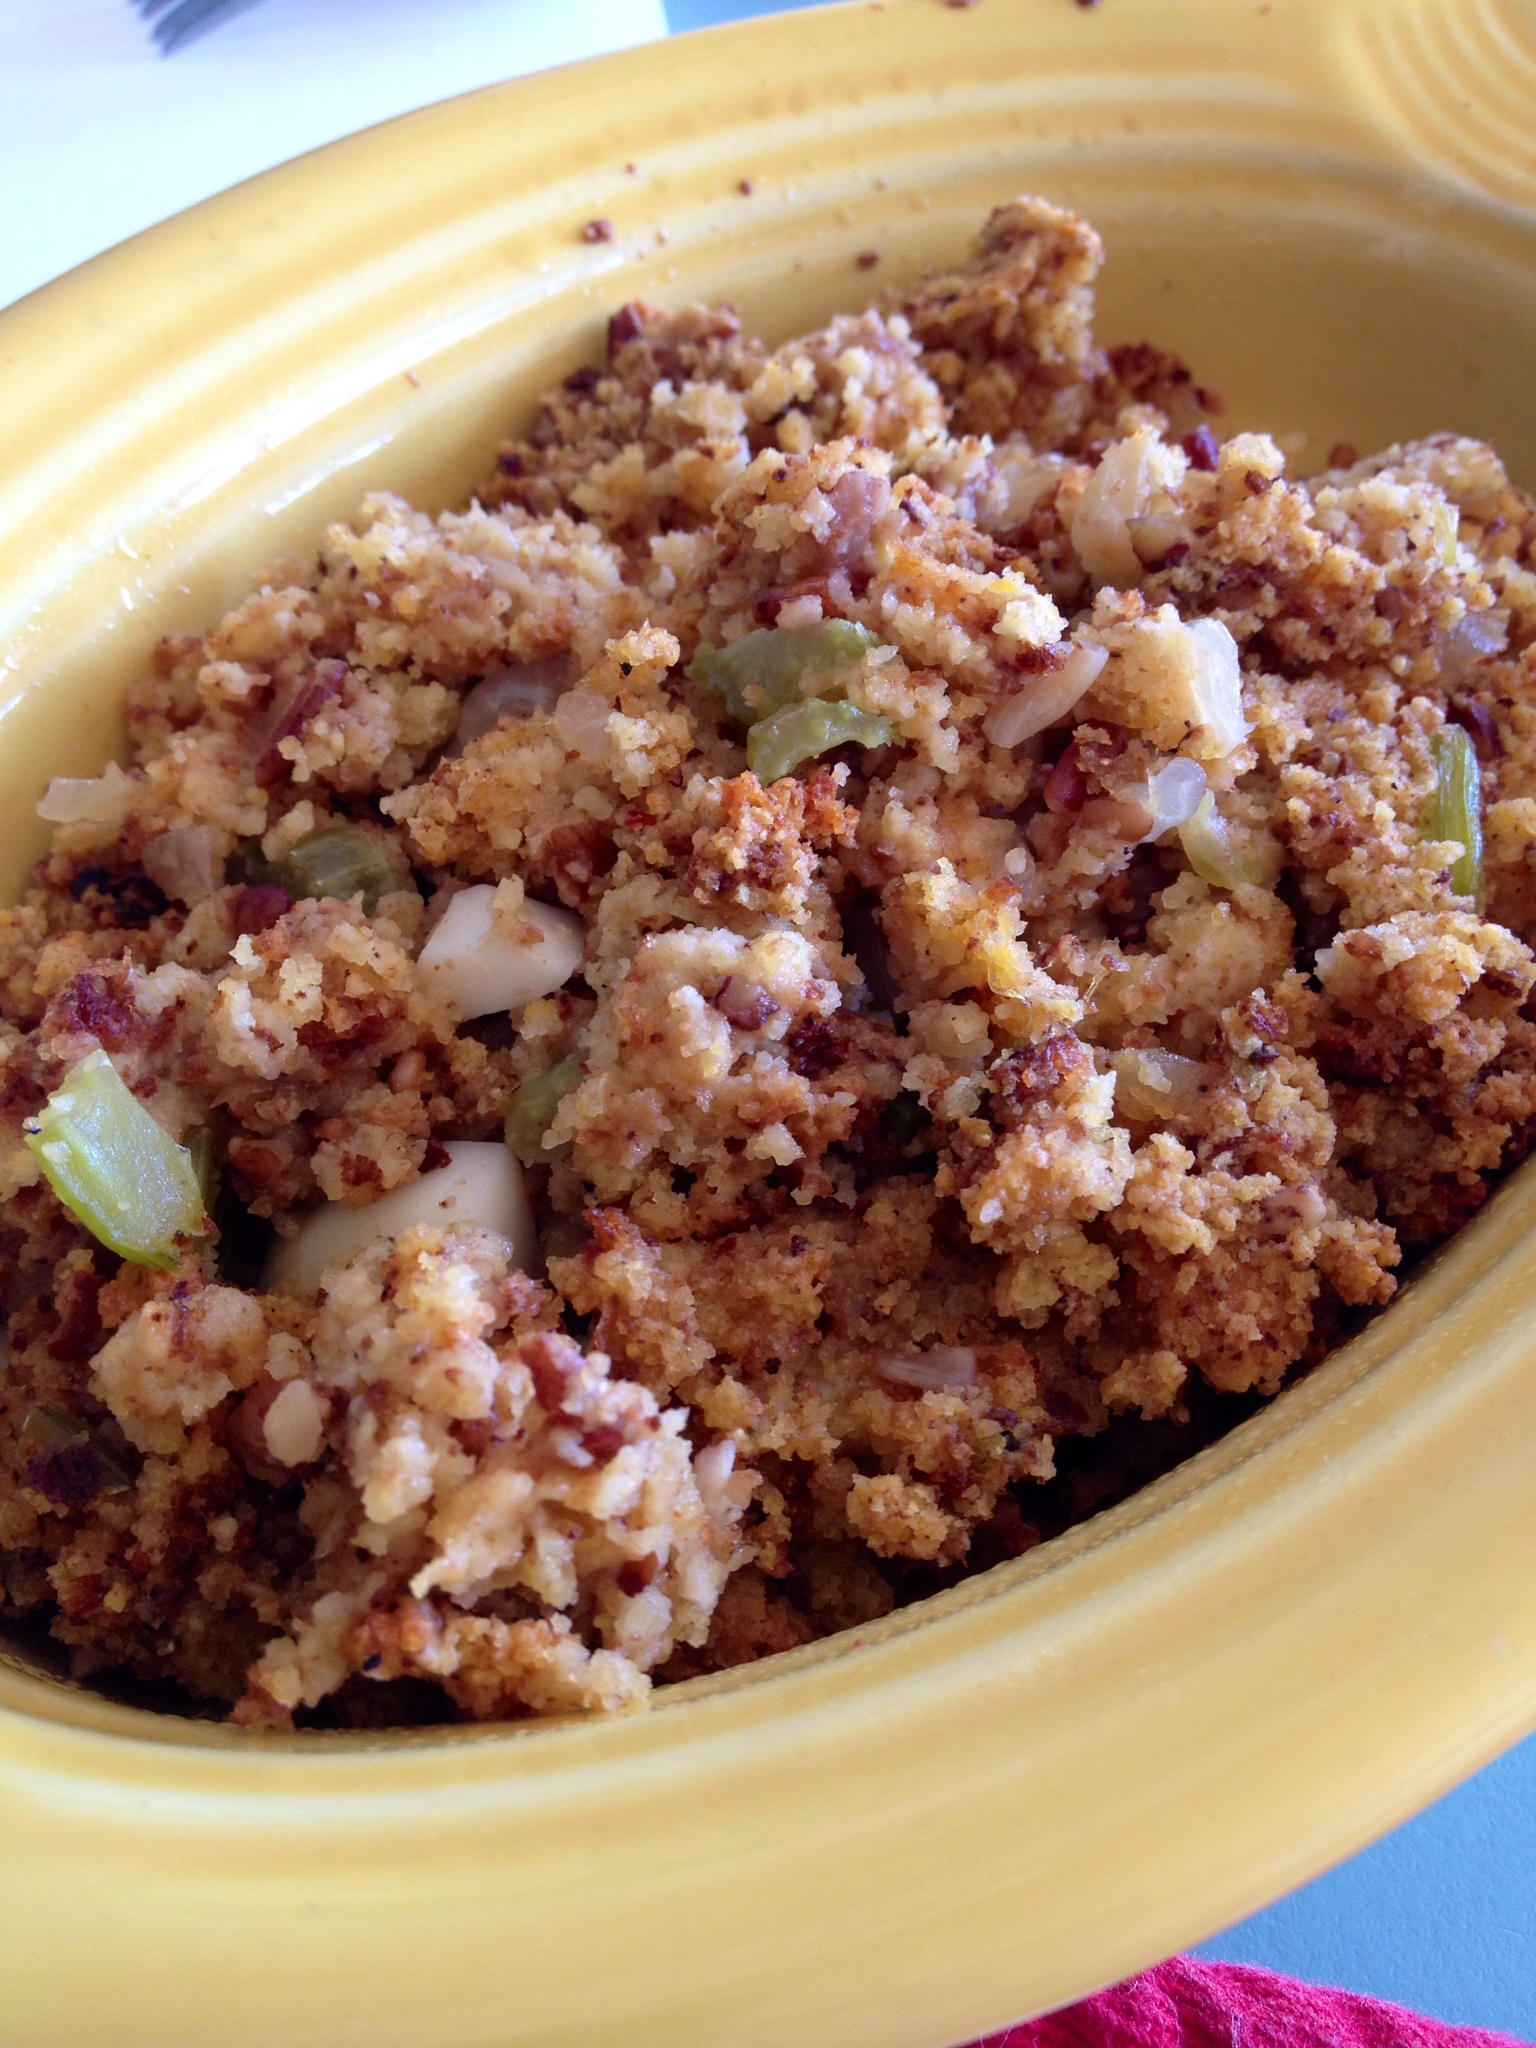
6. Combine the veggies, soup/broth mix, chopped hard boiled eggs, and pecans all together in large mixing bowl with cornbread/breadcrumbs mixture. Now listen because THIS IS IMPORTANT!!! Do not stir this up too much, because it will cause the dressing to become dense instead of fluffy and delicious. Have you ever tasted someone’s dressing and the texture is similar to a fruit cake/door stop? That’s because they stirred it too much. Stir just enough to combine and place in 9×11 buttered baking dish.

Now, if you’re like me and going to freeze this before Thanksgiving, this is where you get out your plastic wrap and foil. First, wrap 1-2 layers of plastic wrap around baking dish and press plastic wrap onto dressing so that it is actually touching the top. Then finish with a layer of foil. The day before Thanksgiving you can take this out and place it in your fridge to defrost, then bake at 350F for 45 minutes. Otherwise, if you’re making it right now just cook as I just said and bask in the deliciousness that is Southern Cornbread Dressing. Go ahead and pour yourself a glass of wine, you’ve earned it tackling Turkey Day ahead of time!
Cooked Cornbread Dressing

Southern Turnip Greens

Standard
Southern Turnip Greens

Turnip Greens

I think Billy Currington said it best with his lyrics “Thank God for good directions and turnip greens.” I love greens and especially turnip greens! This recipe is great for just them, or you can mix and combine any greens together as well. The trifecta for me is collard, mustard, and turnip greens together, but this time I stuck with the classic original turnip greens. I love to serve these aside grilled chicken and sometimes I’ll even eat a big bowl of them for breakfast. I also like to shake a little pepper sauce on them to wake them up a little bit! Here’s what you’ll need…

Ingredients:
1 big bunch of greens roughly chopped (you can get these already chopped in a bag in the salad isle if you don’t feel like doing them yourself)
1 sweet onion chopped
2-3 cloves of chopped garlic
6-8 slices of bacon chopped into 1-2 inch pieces
1/8 tsp (pinch) of cayenne pepper
1 chicken bouillon cube (I only use Knorr brand)
1/2 tsp garlic salt
Pepper
Olive oil
3 cups of water

1. In a pot saute onion with a little olive oil for about 15 minutes on medium to high heat. You want them to start caramelizing before you add anything else in. Once this happens, put your bacon in and cook for about 5 minutes before adding your chopped garlic in. Continue to cook for another 7-10 minutes or so until the bacon is mostly cooked. (I know traditionally in the South people use a ham hock here, but I really do prefer the bacon flavor over the ham hock. Scandalous, I know!)

2. You’ll probably have to do this in batches, but start adding in handfuls at a time chopped greens. You’ll need to saute each batch for a few minutes to make room for the rest to make it into your pot. Once you’ve done this 2-3 times, you should be about finished with wilting down your greens. Now you can add your seasonings.

3. You’ll want to add your water to the greens just so that they’re slightly covered. For me, this was about 3 cups. Then you’ll let the greens simmer with the lid on for a while until they are tender and delicious.

*Note* Some people like to add the actual turnips into the greens and serve them with them as well. If you want to do this, get out your best peeler and a glass of wine, because this will take a little time to get the turnips peeled. Chop them up into bite size pieces and add to the greens when you’re adding the water. You’ll need to let them simmer for at least 30 minutes for them to cook, and you might consider adding additional seasoning. Taste it first though before you add anything to make sure. Enjoy 🙂